

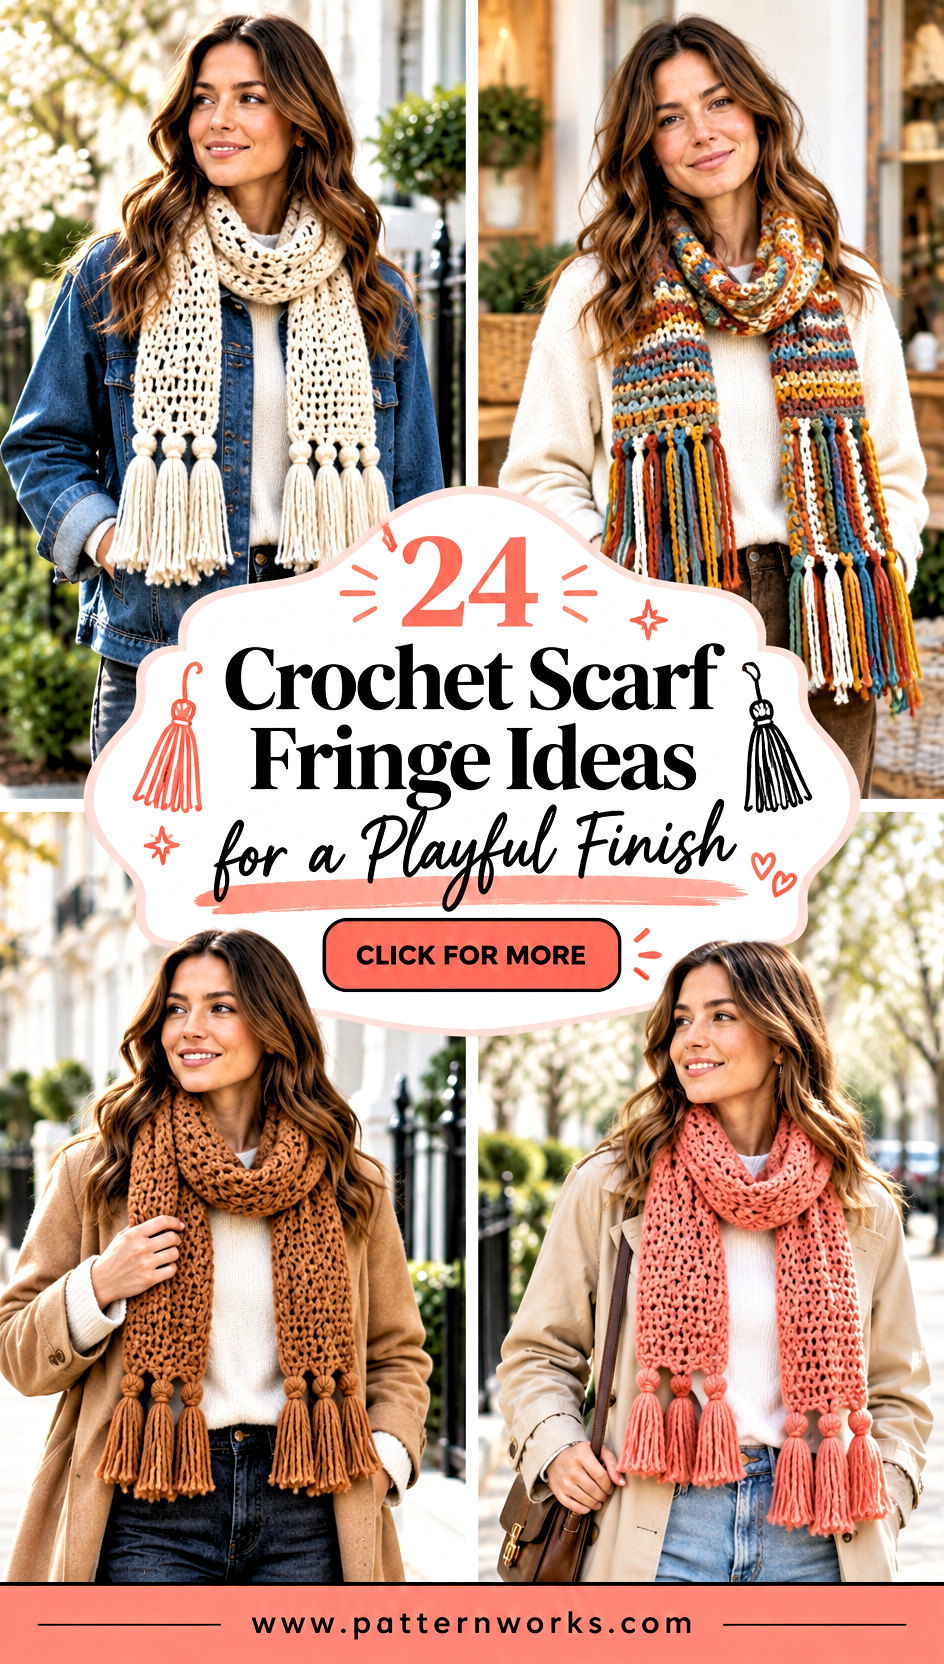
Fringe can turn a basic handmade scarf into a polished accessory with movement, texture, and personality. These 24 Crochet Scarf Fringe Ideas explore classic finishes, modern knots, playful color combinations, and decorative techniques for many skill levels. Some options need only scissors and leftover yarn, while others use simple braiding, twisting, crocheted chains, beads, or pom-poms. Before committing, make a few sample strands and check how their length and weight affect the scarf’s drape. Dense fabrics can usually support fuller fringe, while lightweight lace looks balanced with delicate or widely spaced details. Whether you are finishing a new project or refreshing an older piece, you will find an achievable design among these 24 Crochet Scarf Fringe Ideas.
1. Crochet Scarf With Classic Straight Fringe
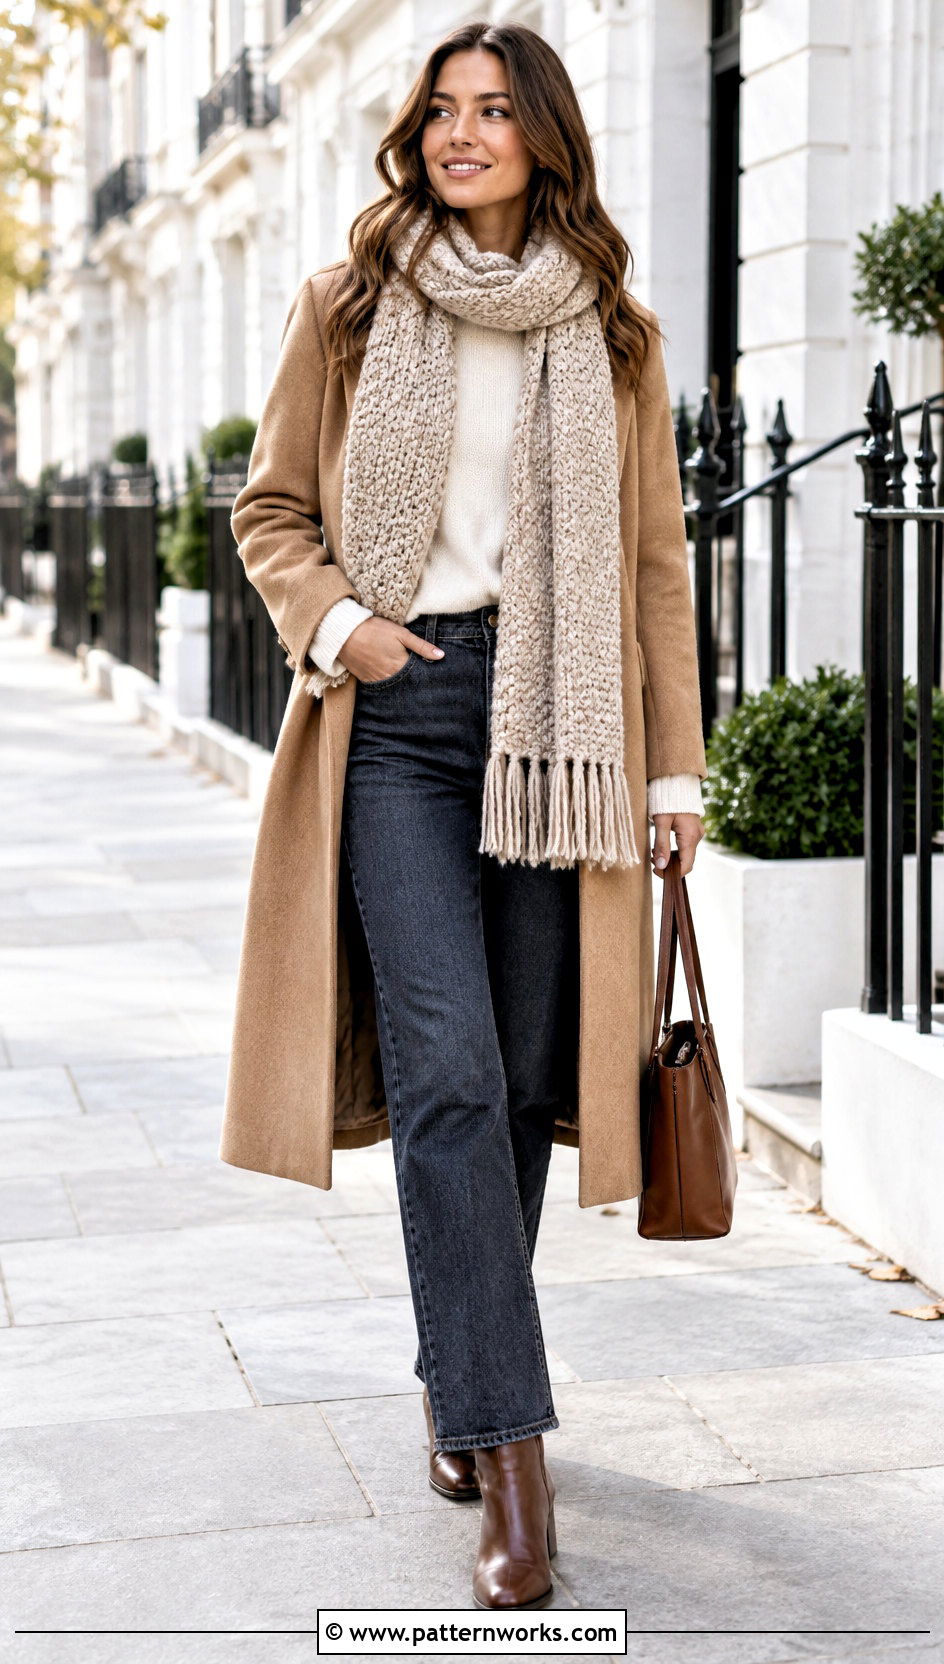
Classic straight fringe is an easy finishing choice for almost any rectangular crochet scarf. Cut equal lengths of yarn, fold each bundle in half, and pull the folded center through an edge stitch with a crochet hook. Bring the loose ends through the loop, then tighten gently. Attach the bundles at evenly spaced intervals across both short edges. Three or four strands per bundle usually create a noticeable finish without excessive bulk. Match the fringe to the scarf for a seamless appearance, or choose a contrasting shade for definition. Once everything is attached, hang the scarf vertically and trim the ends with sharp scissors. This final step helps the fringe look level, tidy, and professionally finished.
2. Crochet Scarf With Short Tidy Fringe
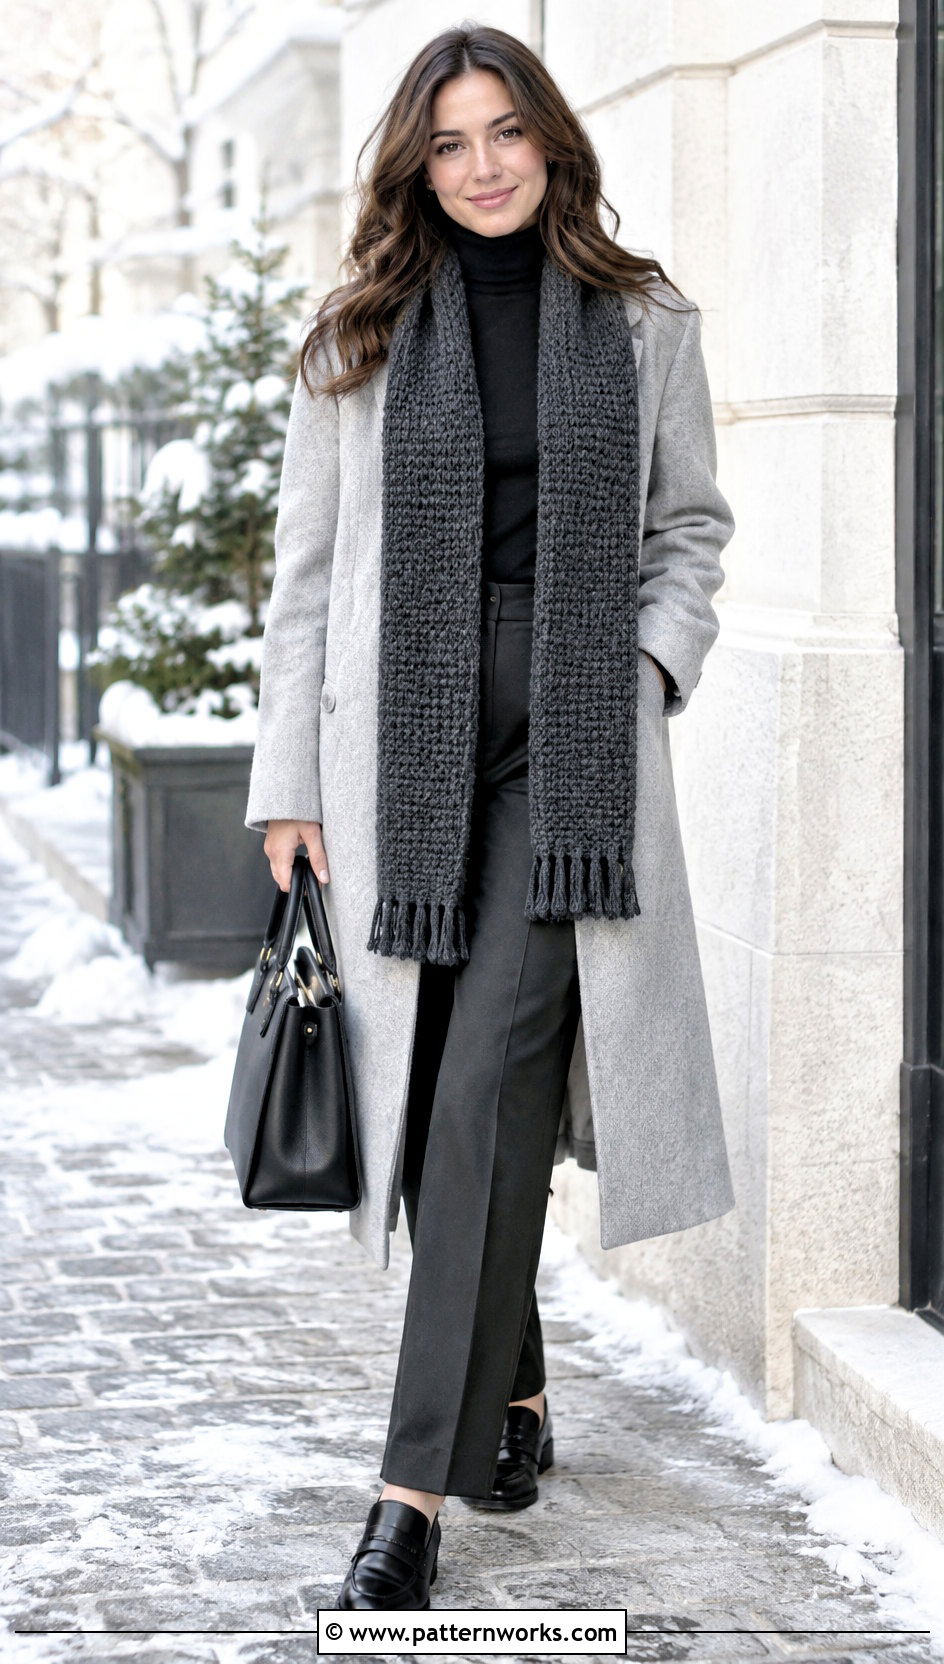
Prefer a practical finish that will not brush against your coat or become tangled? Short fringe gives a crochet scarf subtle movement while maintaining a neat silhouette. Cut strands long enough to produce a finished fringe of about two to three inches after folding. Use small bundles and attach them consistently across each end. This treatment works especially well with ribbed, moss stitch, waffle stitch, or other structured scarves because it complements the fabric without hiding its texture. Keep the attachment knots firm but not so tight that they distort the edge stitches. After adding every bundle, smooth the scarf on a flat surface and trim the fringe carefully. The result feels understated, wearable, and suitable for everyday winter outfits.
3. Crochet Scarf With Extra Long Fringe
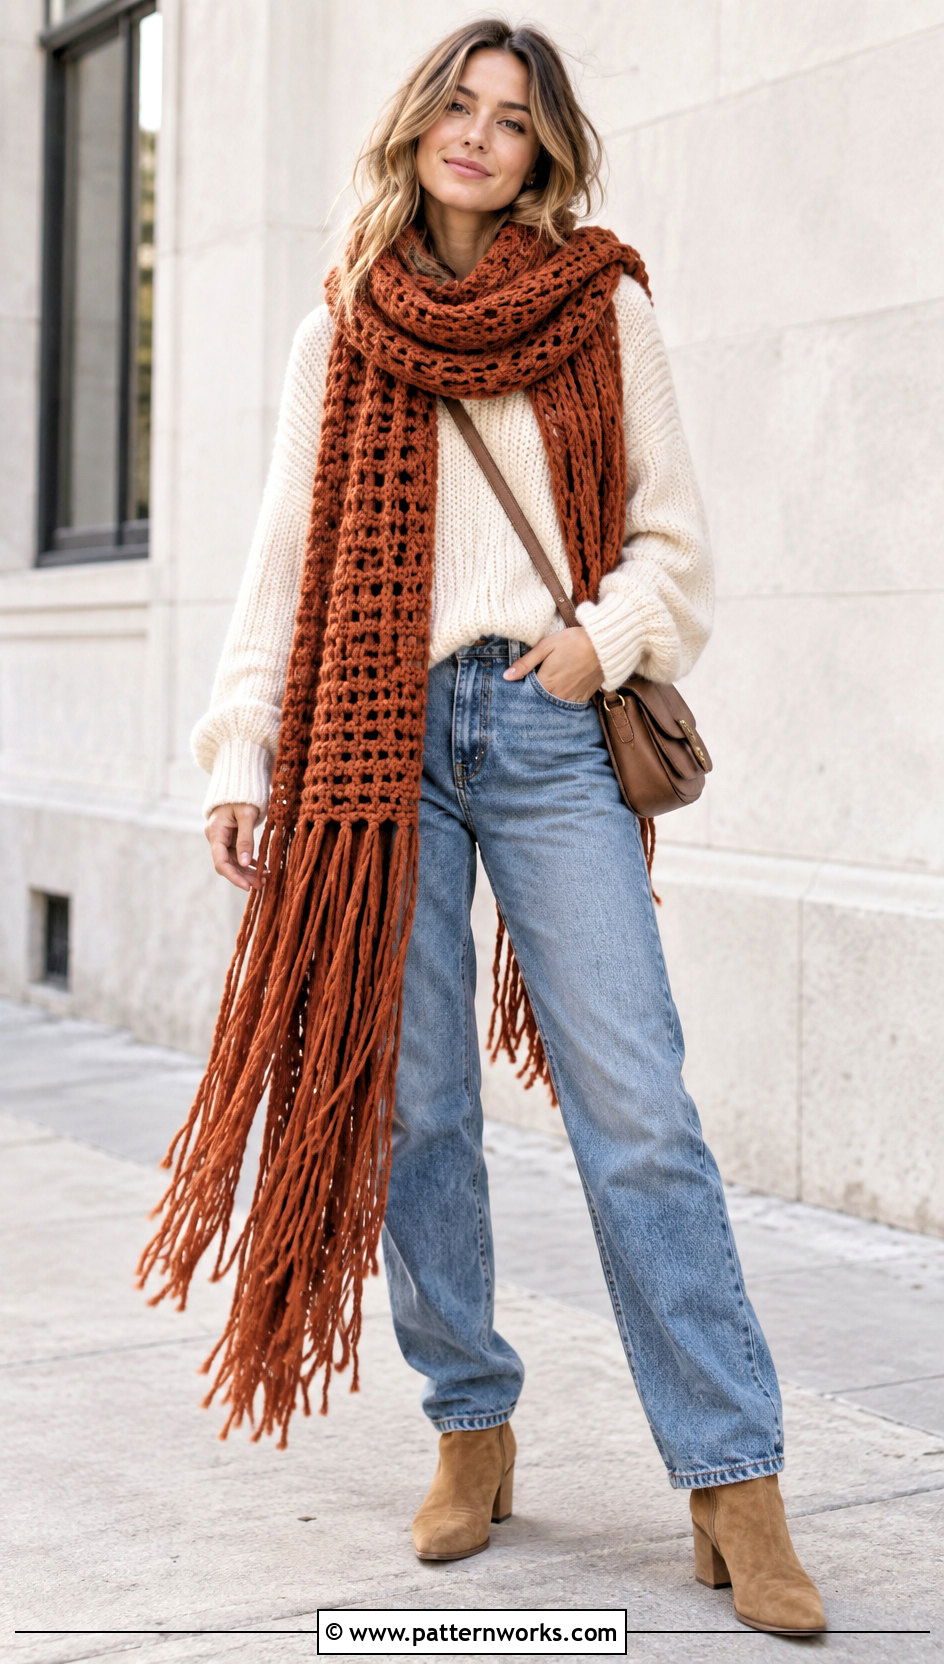
Long fringe creates a dramatic, flowing finish that suits oversized scarves and relaxed bohemian designs. Begin with strands measuring at least twice the desired finished length, remembering that knots and trimming will shorten them. Attach generous bundles along both ends, leaving enough room between them to prevent the edge from becoming heavy. Long fringe looks particularly striking on a wide scarf made with simple stitches because the movement becomes the main decorative feature. Test several bundles before cutting all your yarn. This allows you to evaluate the proportion and confirm that the scarf still hangs comfortably. Finish by placing the scarf on a table and trimming the strands into a straight line, shallow curve, or soft point, depending on your preferred shape.



4. Crochet Scarf With Twisted Rope Fringe
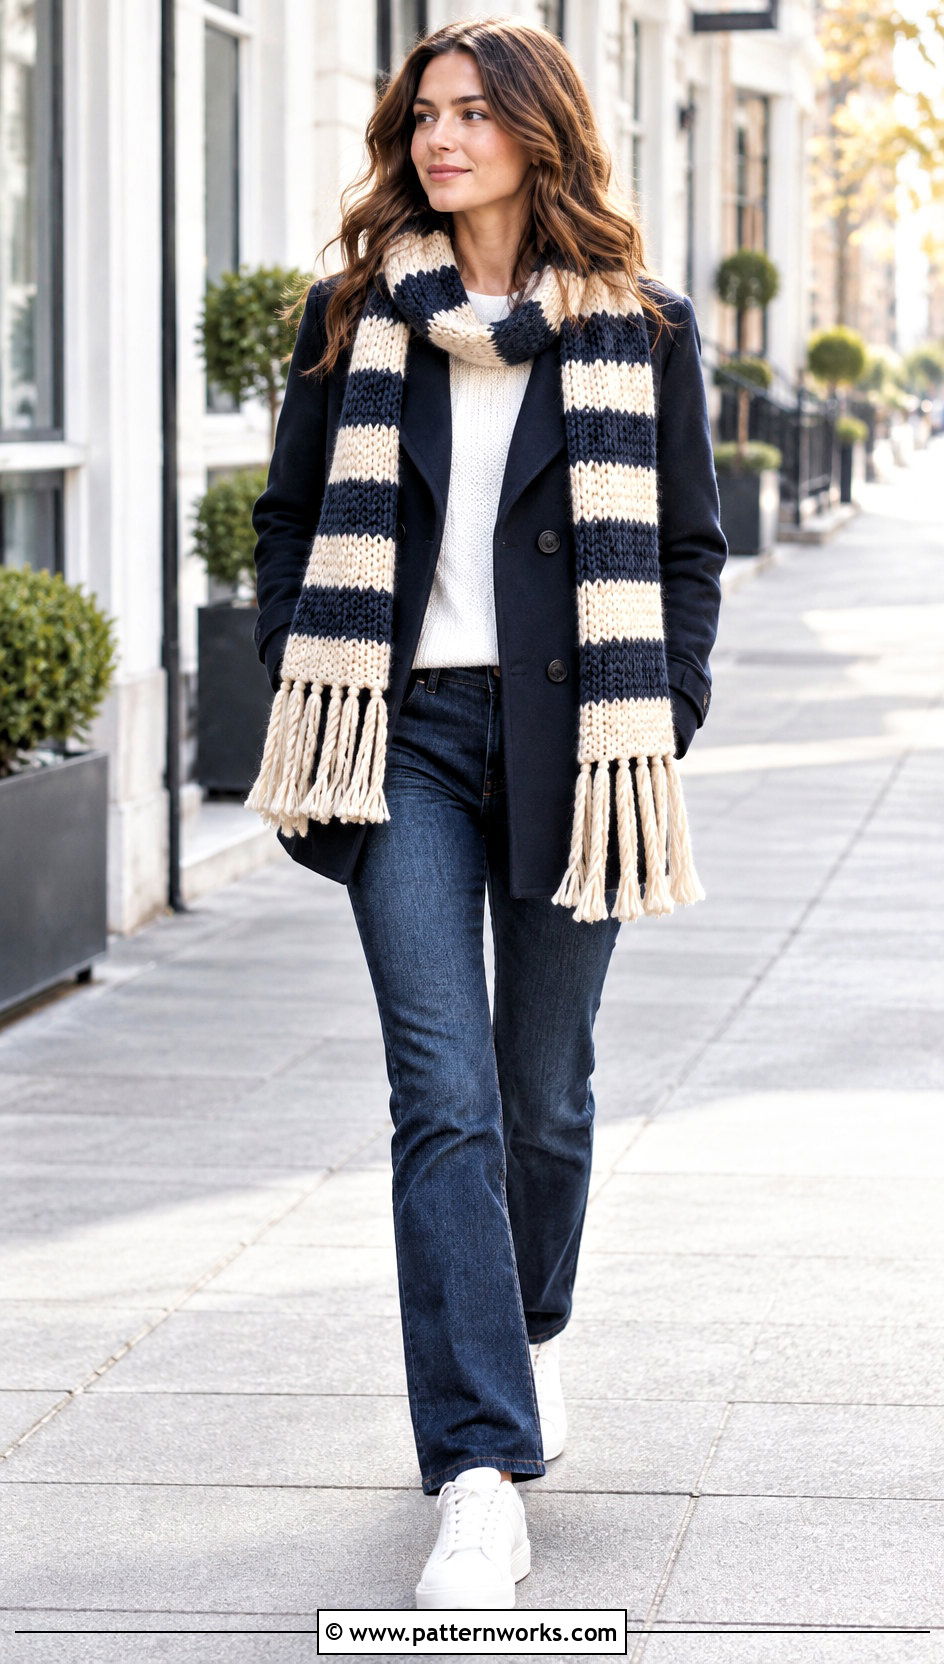
Twisted fringe offers cleaner definition than loose strands and gives each attachment point a cord-like appearance. To create it, divide one fringe bundle into two equal sections. Twist both sections in the same direction until they feel firm, then twist them together in the opposite direction. Secure the bottom with an overhand knot. The opposing twists help the finished cord hold its shape. Use evenly measured yarn and count your turns if you want every rope to look consistent. This structured treatment pairs beautifully with striped scarves, Tunisian crochet, dense ribbing, and simple color-block patterns. Hang the completed scarf before making the final trim because twisted cords may shorten or settle differently from ordinary fringe.
5. Crochet Scarf With Braided Fringe
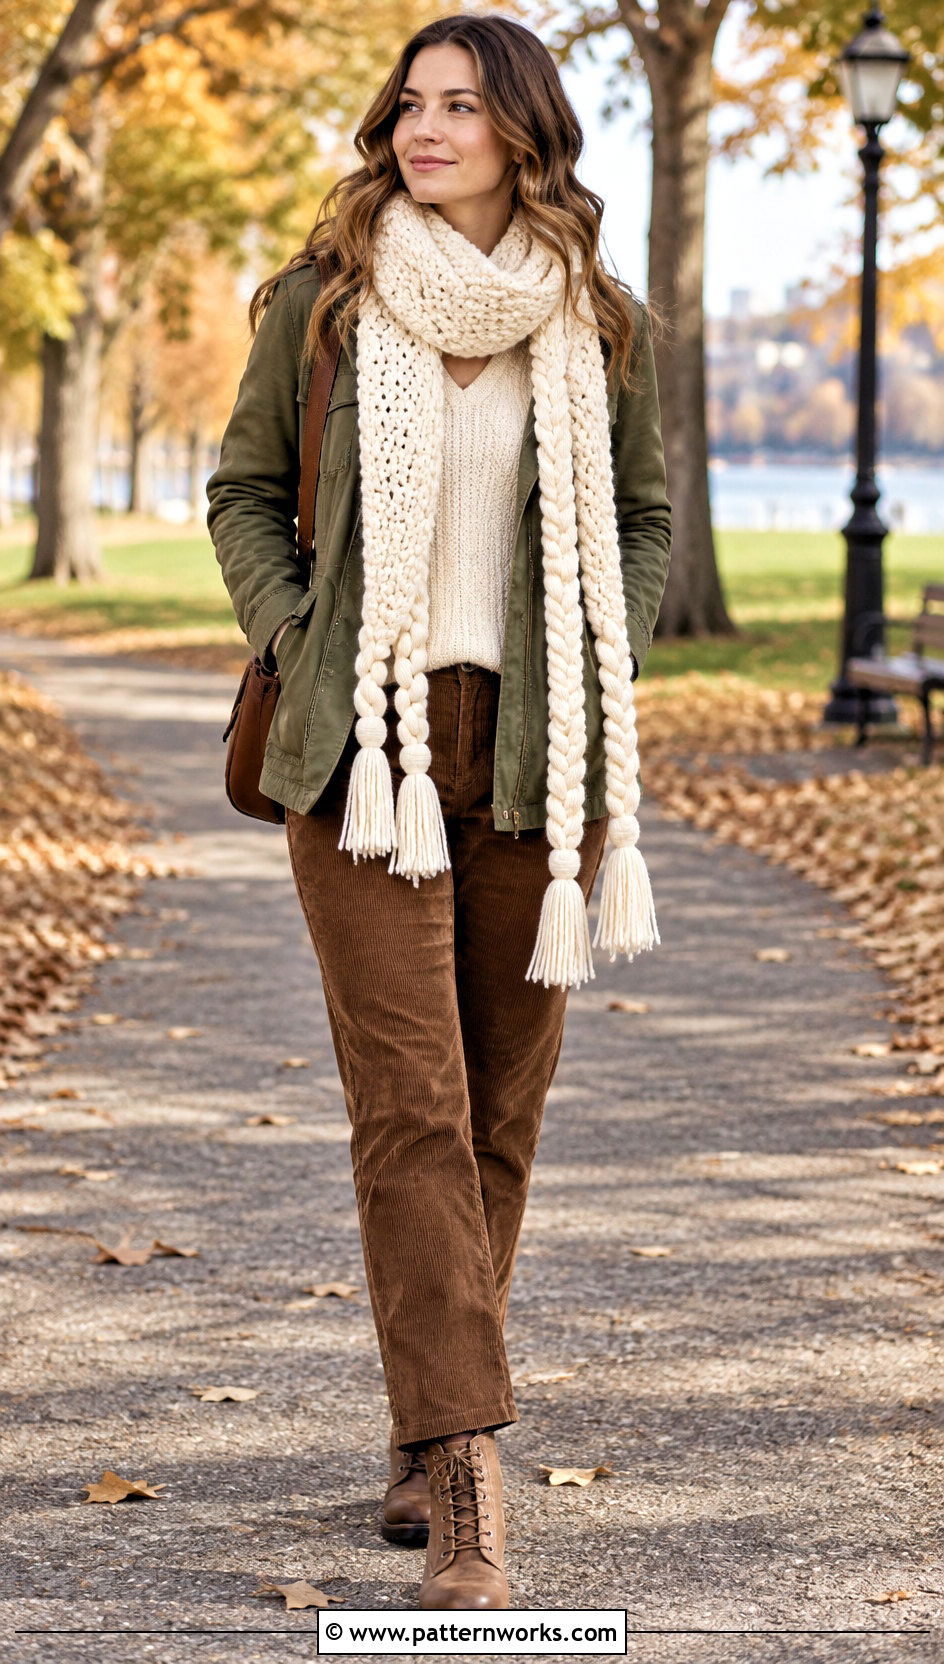
Braided fringe adds handcrafted detail while keeping longer strands controlled. Attach regular yarn bundles to the scarf, then separate each bundle into three balanced sections. Braid them loosely enough to preserve softness but firmly enough to prevent gaps. Tie a compact knot at the bottom and trim the remaining ends evenly. You can make one braid from every attached bundle or combine neighboring bundles to form wider statement braids. A solid scarf with multicolored braids creates playful contrast, while matching yarn delivers a more refined finish. This design is particularly useful for scarves made with smooth yarn because the braid pattern remains clearly visible. Avoid pulling too tightly near the scarf edge, since excessive tension may cause the ends to gather or curl.
6. Crochet Scarf With Double-Knot Fringe
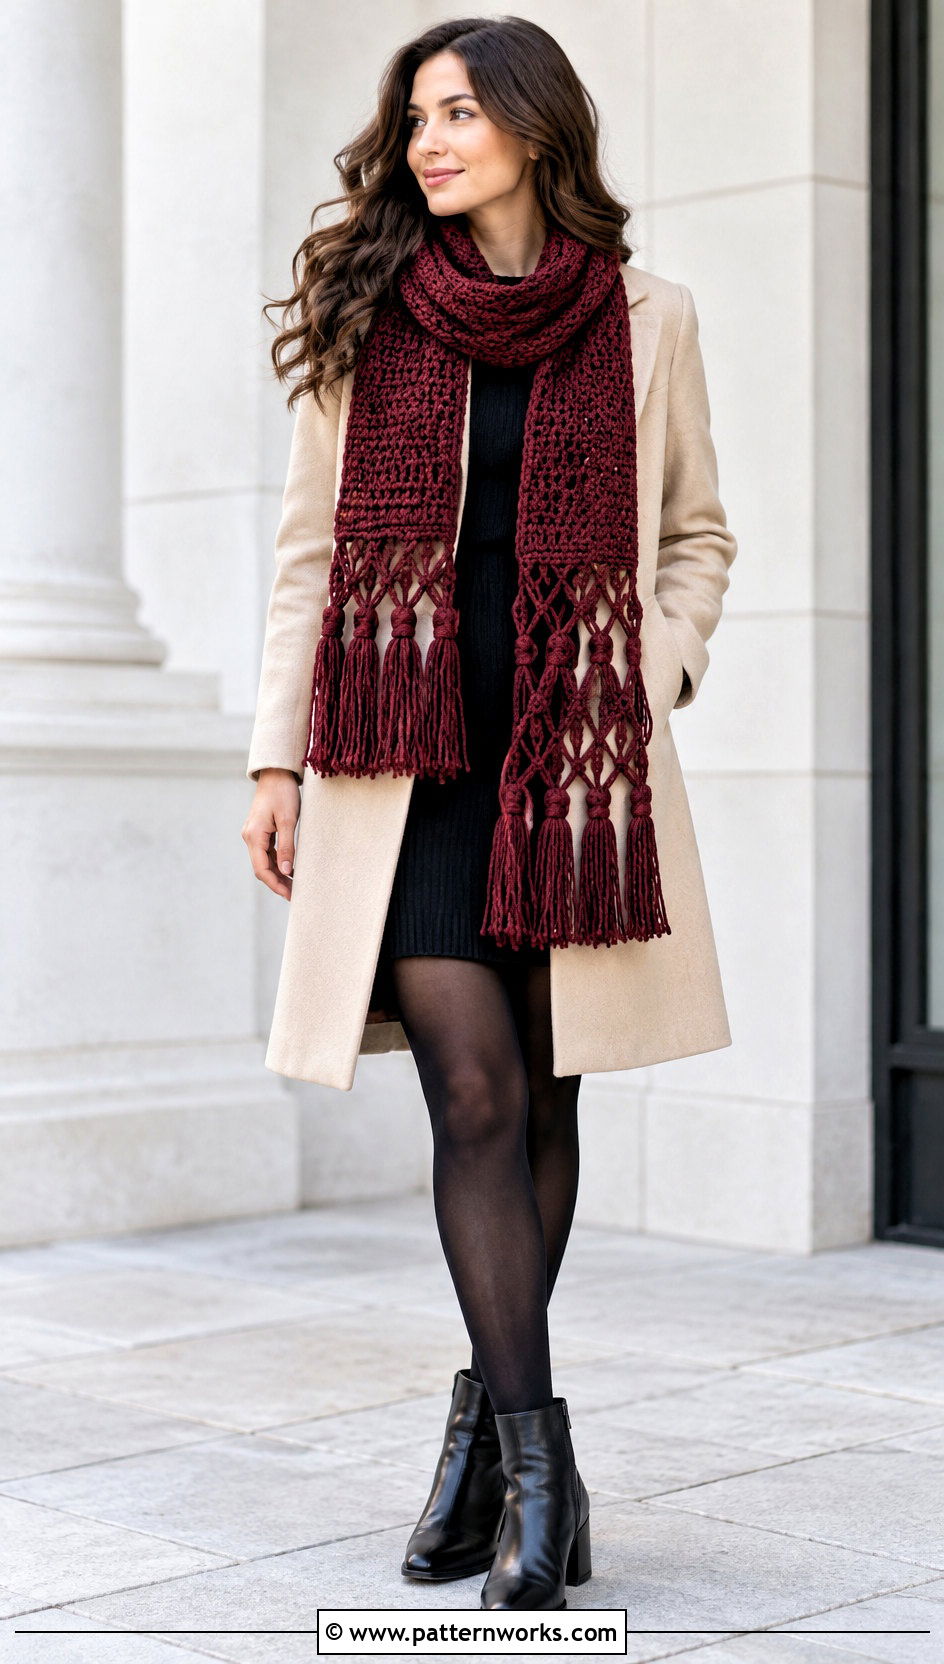
Double-knot fringe transforms ordinary strands into a decorative lattice. Begin by attaching loose fringe bundles in a standard row. A short distance below the scarf edge, divide each bundle and knot half of it together with half of the neighboring bundle. Repeat across the row to create connected diamond shapes. Add another level of knots if you want a fuller net pattern, keeping the spacing as consistent as possible. This finish works best when the strands are long enough for knotting and still leave a flowing tail. Use smooth, well-defined yarn so the pattern remains easy to see. A ruler or cardboard spacer can help position the knots evenly. The completed scarf has texture, movement, and a sophisticated handmade appearance.
7. Crochet Scarf With Macrame Fringe
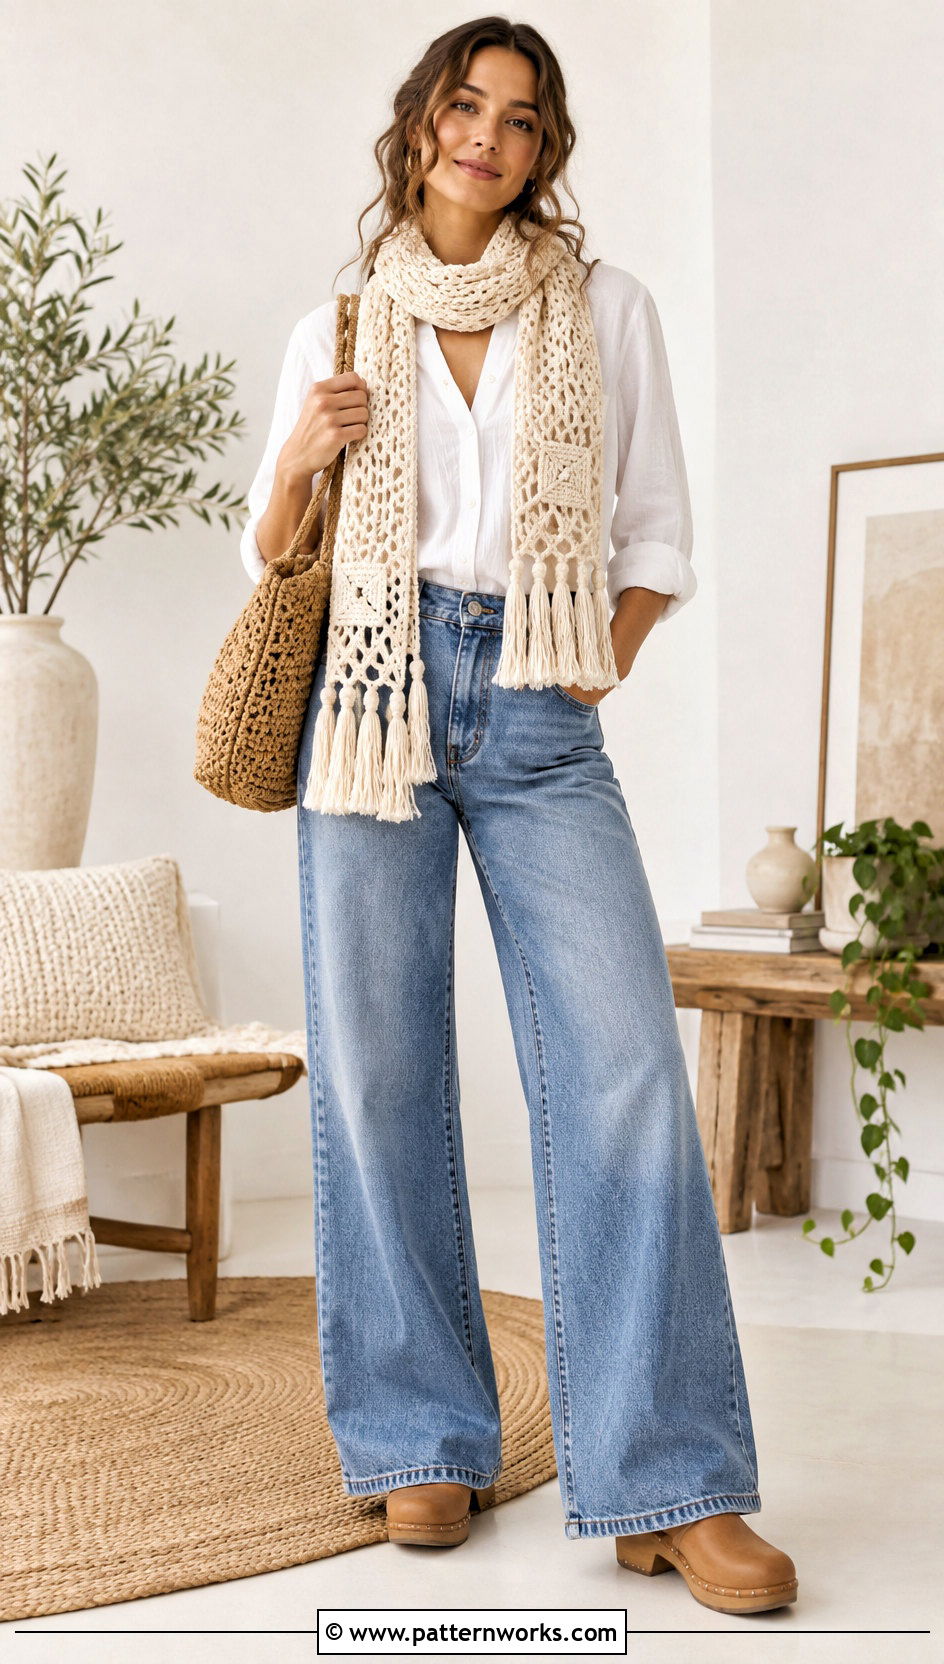
Macrame-inspired fringe brings structured knots and an artisan feel to a simple crochet scarf. Start with long attached strands and use basic square knots to form a narrow decorative band beneath the scarf edge. Continue with one row for a clean finish or build two staggered rows for a more intricate pattern. Keep your tension steady so the knots sit at the same height and the edge remains flat. Cotton or a smooth cotton-blend yarn is an excellent visual choice because it shows the knot structure clearly. Pair this fringe with an uncomplicated scarf body, such as single crochet, linen stitch, or open mesh. The detailed border already provides plenty of interest, so the fabric and colors can remain simple and balanced.

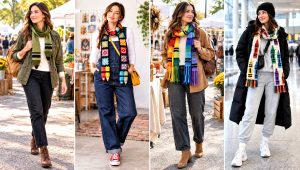

8. Crochet Scarf With Chunky Tassel Fringe
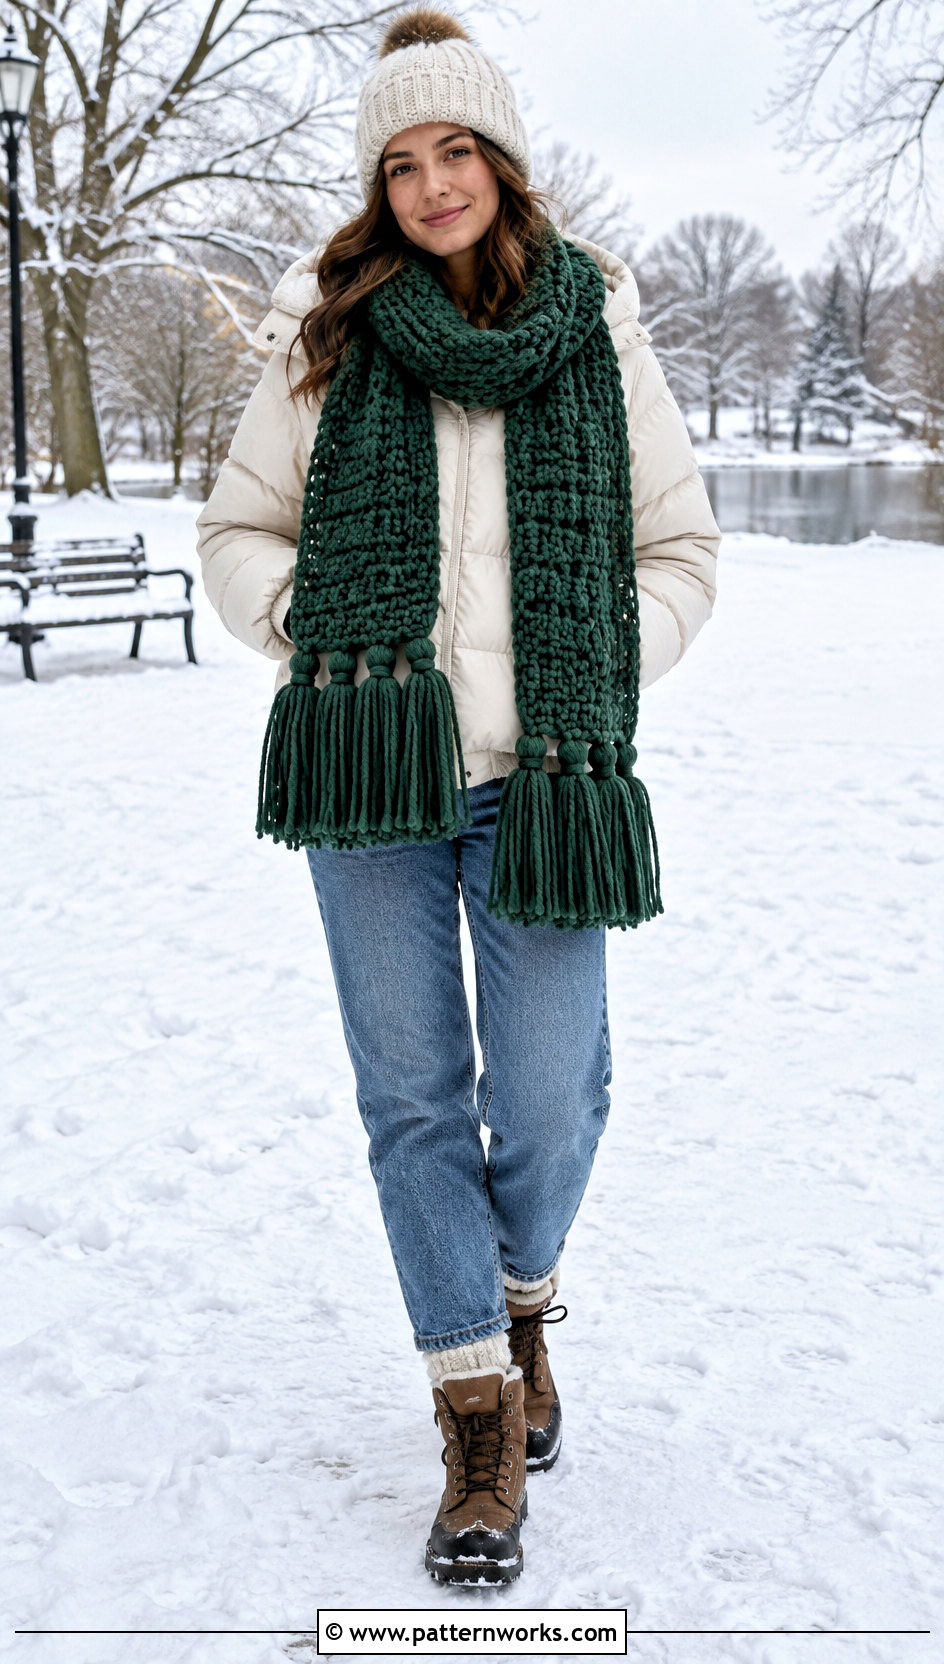
Large tassels make bold finishing points without covering the entire edge in loose yarn. Create each tassel by wrapping yarn around a piece of cardboard, tying the top securely, and cutting the loops at the opposite end. Wrap another strand around the tassel below the top to form a defined head. Attach three to five tassels across each short edge of a wide scarf, or place one at every corner. Chunky tassels look proportional on blanket scarves, super scarves, and projects made from bulky yarn. Keep them slightly smaller on narrow scarves so their weight does not pull the fabric out of shape. Fluff and trim each tassel individually, then compare their lengths while the scarf is hanging naturally.
9. Crochet Triangle Scarf With Corner Tassels
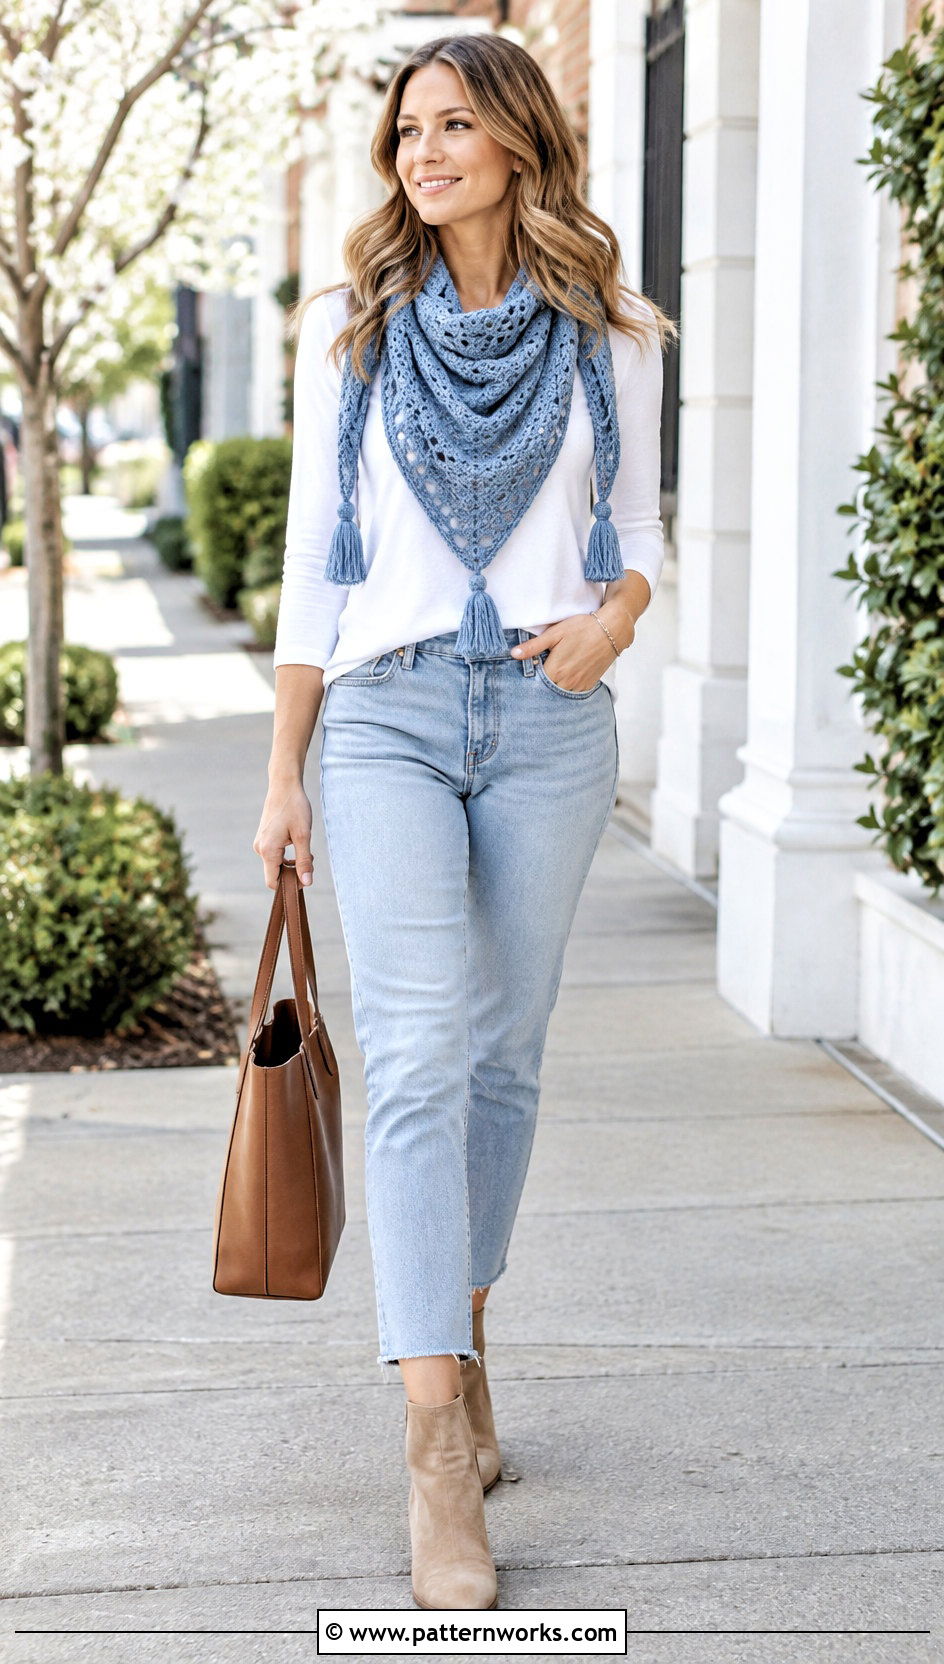
A triangle scarf needs less fringe than a traditional rectangle, making corner tassels a balanced decorative choice. Place one tassel at each outer corner and add a slightly larger tassel at the center point. This arrangement emphasizes the triangular shape while leaving lacework, granny stitches, or textured rows visible. Choose tassels in the main scarf color for a coordinated design, or select one shade from a variegated yarn to create contrast. Before attaching them permanently, pin or loosely tie the tassels in place and try on the scarf. This quick test reveals whether the center tassel feels too heavy or long. Lightweight tassels are usually better for delicate fabric, while denser triangle scarves can comfortably support fuller statement accents.
10. Crochet Scarf With Pom-Pom Fringe
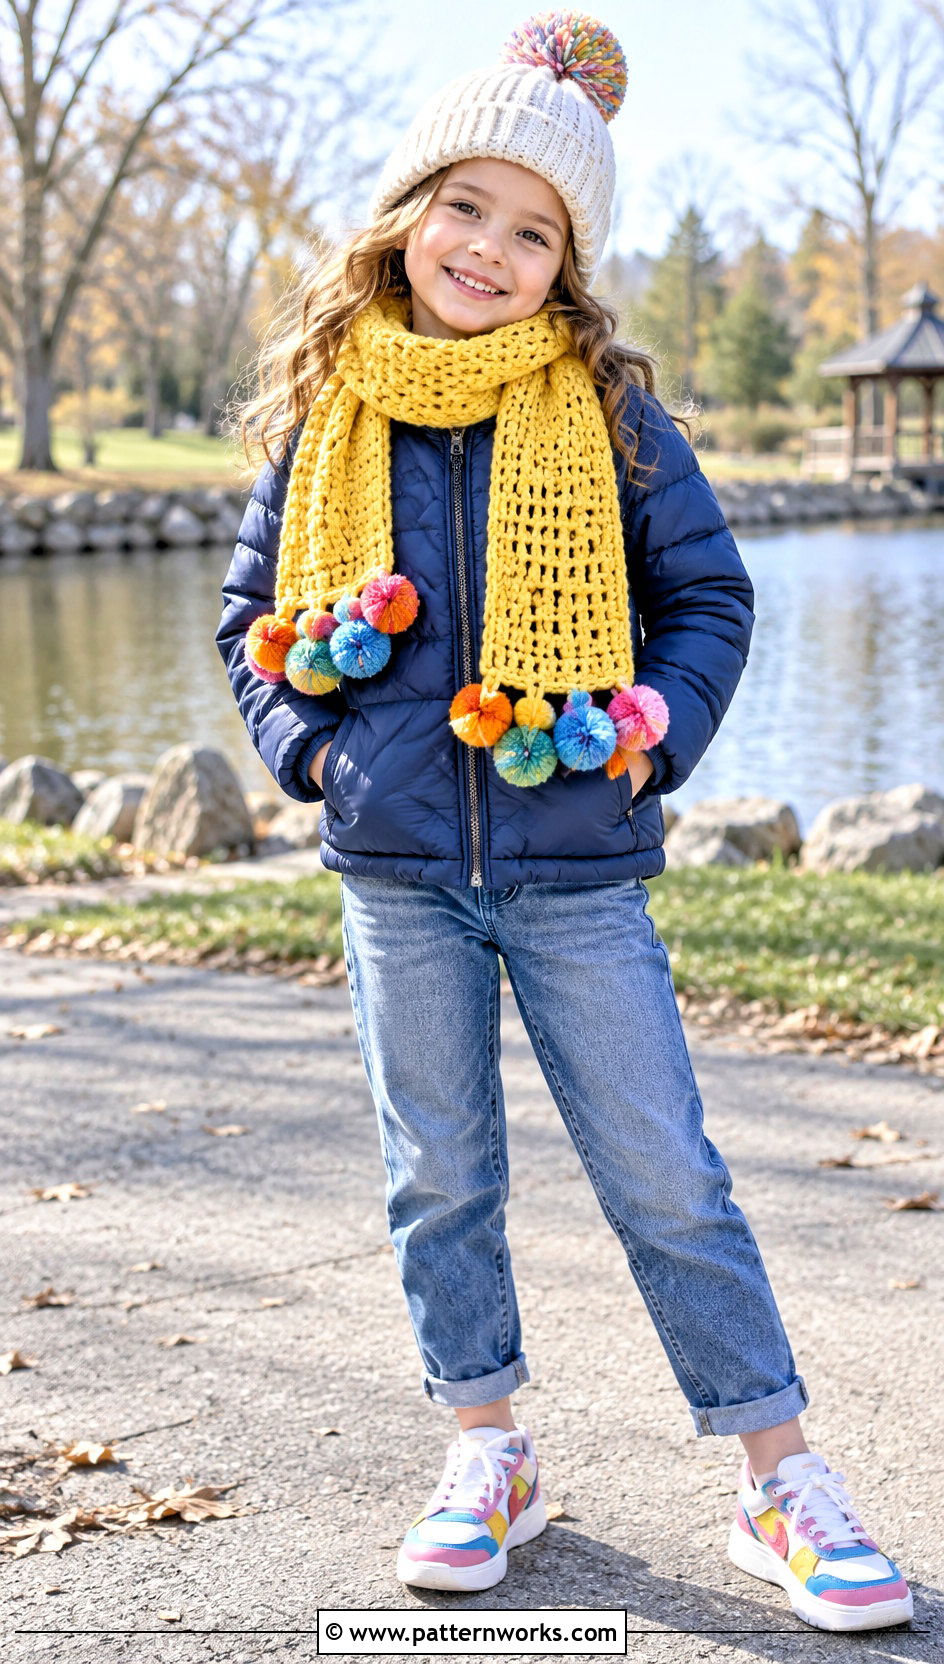
Pom-pom fringe gives a crochet scarf a cheerful finish that works especially well for children’s accessories and colorful casual designs. Make small pom-poms with a pom-pom tool, fork, or cardboard template, then trim each one into a compact round shape. Sew them securely across the scarf ends using strong yarn tails. Closely spaced pom-poms create a fluffy border, while widely spaced pieces offer a lighter and more practical look. Use matching yarn for a soft tonal effect or alternate several colors that appear in the scarf. Because pom-poms can add weight, test the arrangement before attaching the entire row. Small, firmly trimmed pom-poms usually hold their shape better and are less likely to overwhelm a narrow scarf or delicate crochet fabric.
11. Crochet Scarf With Chain Loop Fringe
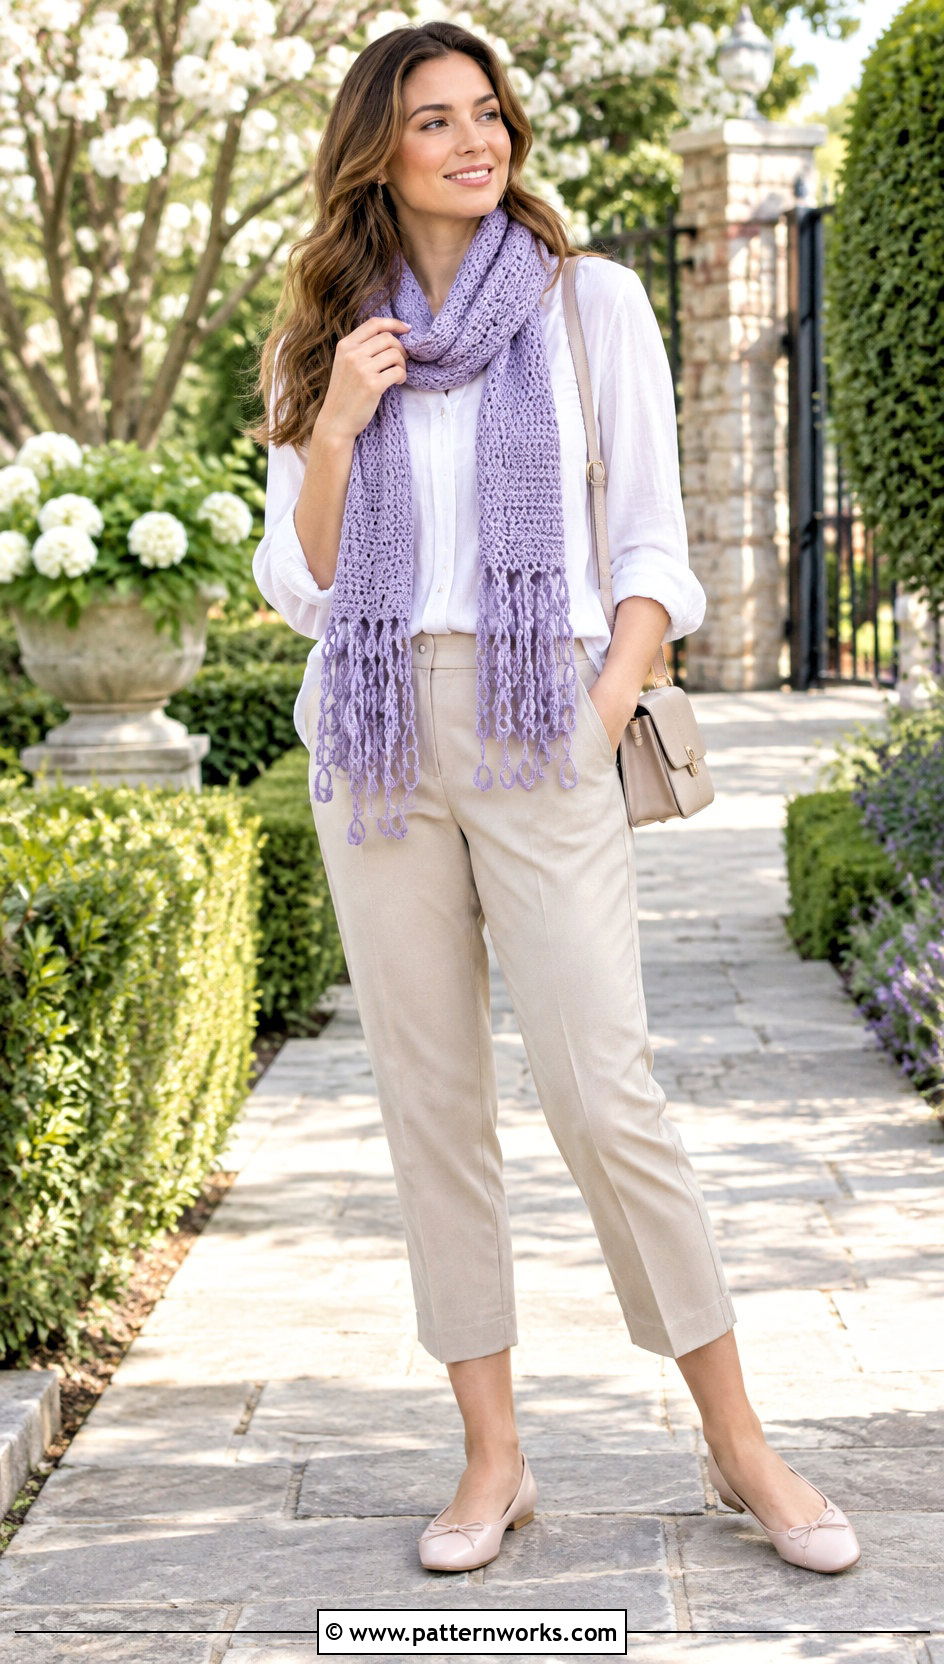
Crocheted chain loops are an excellent alternative when you want fringe without cutting many separate yarn strands. Join yarn to an edge stitch, make a chain of the desired length, and slip stitch back into the same or next attachment point. Repeat across the edge, maintaining a consistent chain count for matching loops. Leave the loops intact for a rounded finish, or vary their length to create a layered border. This technique works beautifully with lightweight scarves because the chains provide movement without the fullness of thick tassels. You can also place a small bead or decorative knot at the bottom of selected loops. Use a slightly smaller hook if the chains appear too loose, uneven, or likely to stretch with wear.


12. Crochet Scarf With Corkscrew Fringe
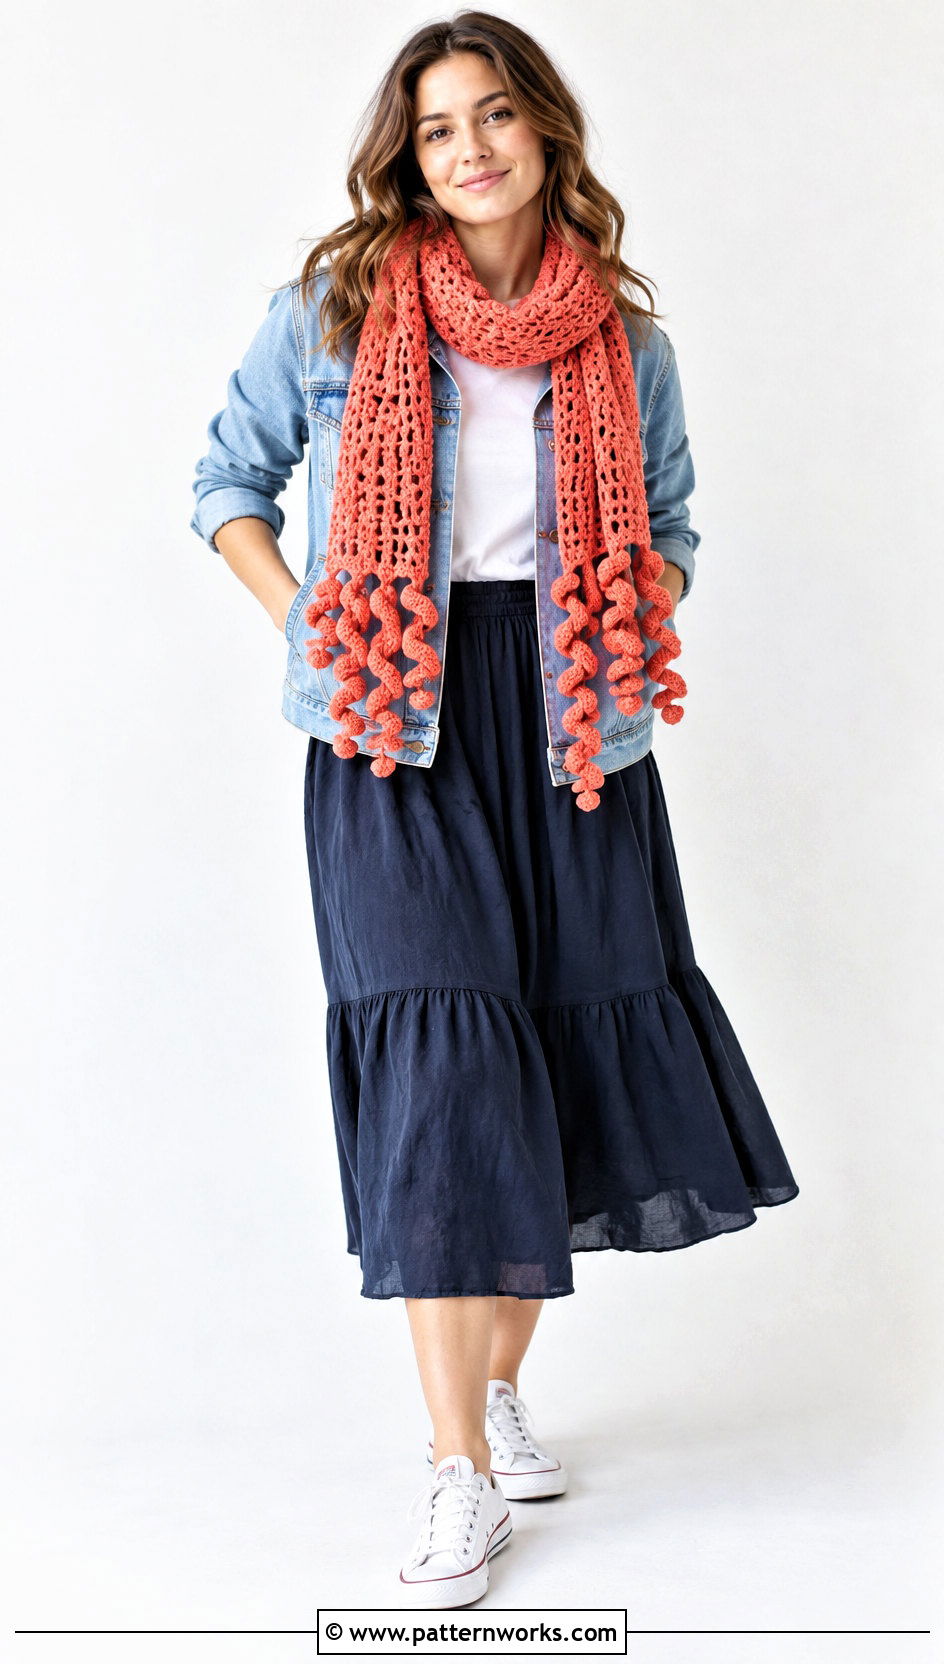
Corkscrew fringe creates lively spiral details that bounce and move with the scarf. Crochet a chain to the desired length, then work multiple stitches into every chain to force the strip into a curl. Single crochet produces a compact spiral, while half-double or double crochet can create a fuller corkscrew. Attach the curls individually across each end, alternating their lengths for extra dimension. This technique is ideal for using leftover yarn because every spiral requires only a small amount. Try tonal colors for a coordinated finish or bright contrasting shades for a playful scarf. Make one test curl before completing the border, since yarn thickness, hook size, and the number of stitches worked into each chain will affect the final spiral shape.
13. Crochet Scarf With Beaded Fringe
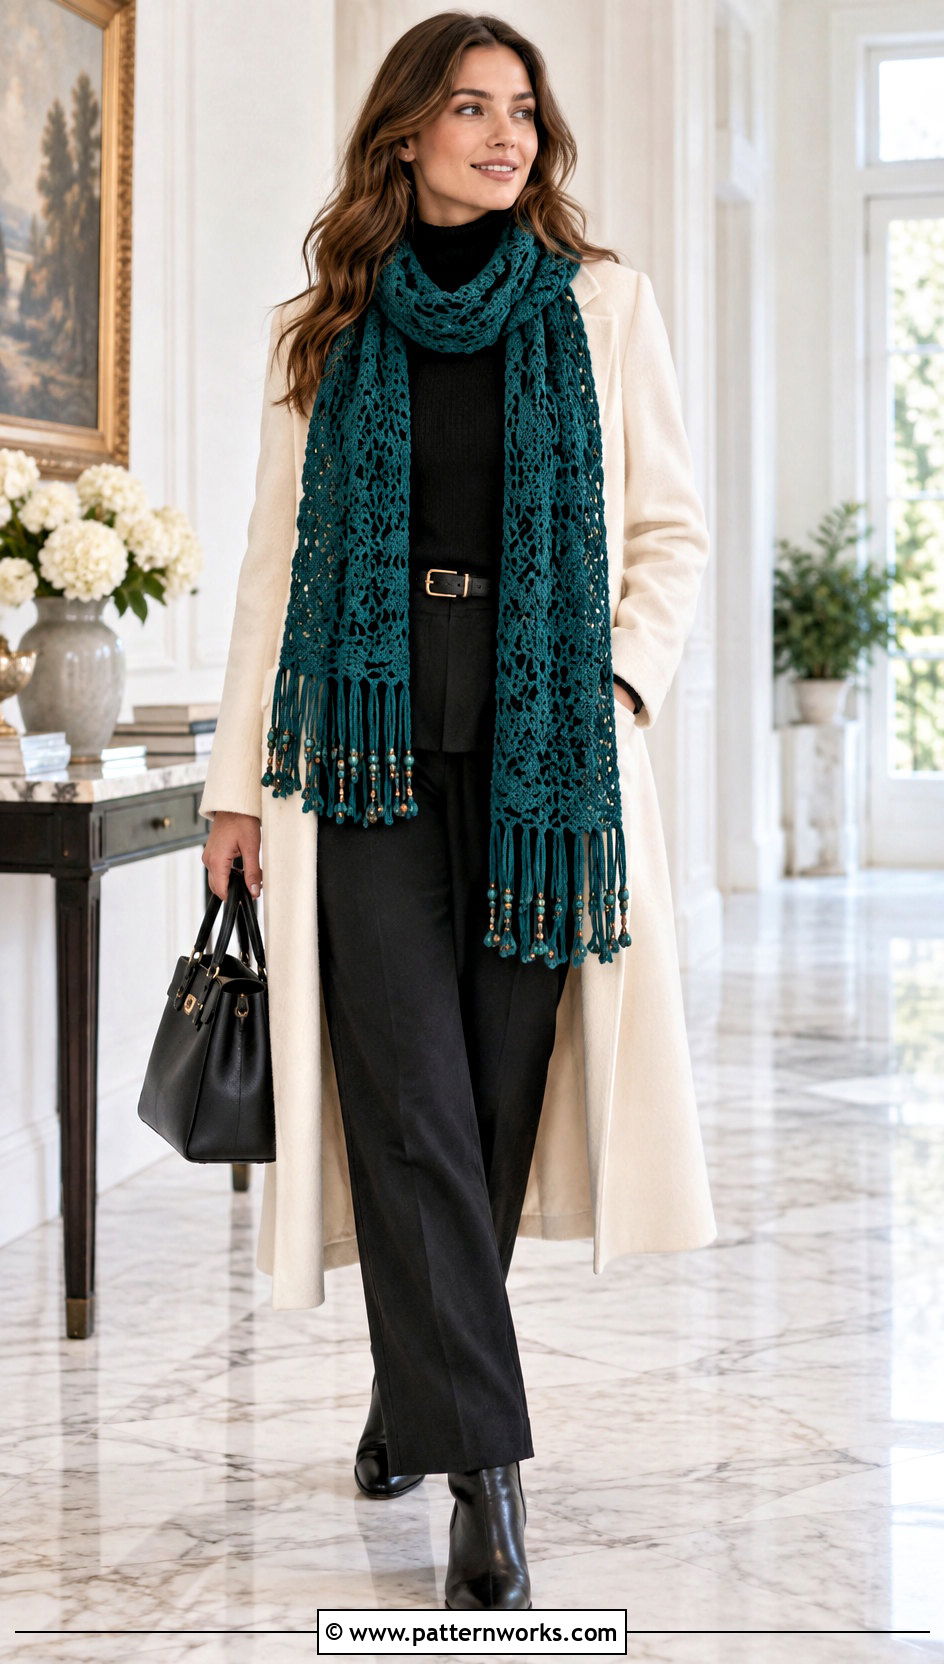
Beads introduce subtle shine and pleasant weight to crochet scarf fringe. Select beads with holes large enough for your chosen yarn, then thread one or two onto individual strands, braids, chains, or twisted cords. Secure each bead with a firm knot underneath so it cannot slide off. Place beads near the bottom of the fringe for a traditional finish, or stagger their positions for a more organic pattern. Lightweight wooden beads complement rustic scarves, while smooth glass-style beads suit refined lace or evening accessories. Avoid overloading delicate fabric because heavy embellishments may stretch the edge. Always check that every bead is securely attached, particularly when the scarf is intended as a gift or will be worn around children.
14. Crochet Scarf With Two-Tone Fringe
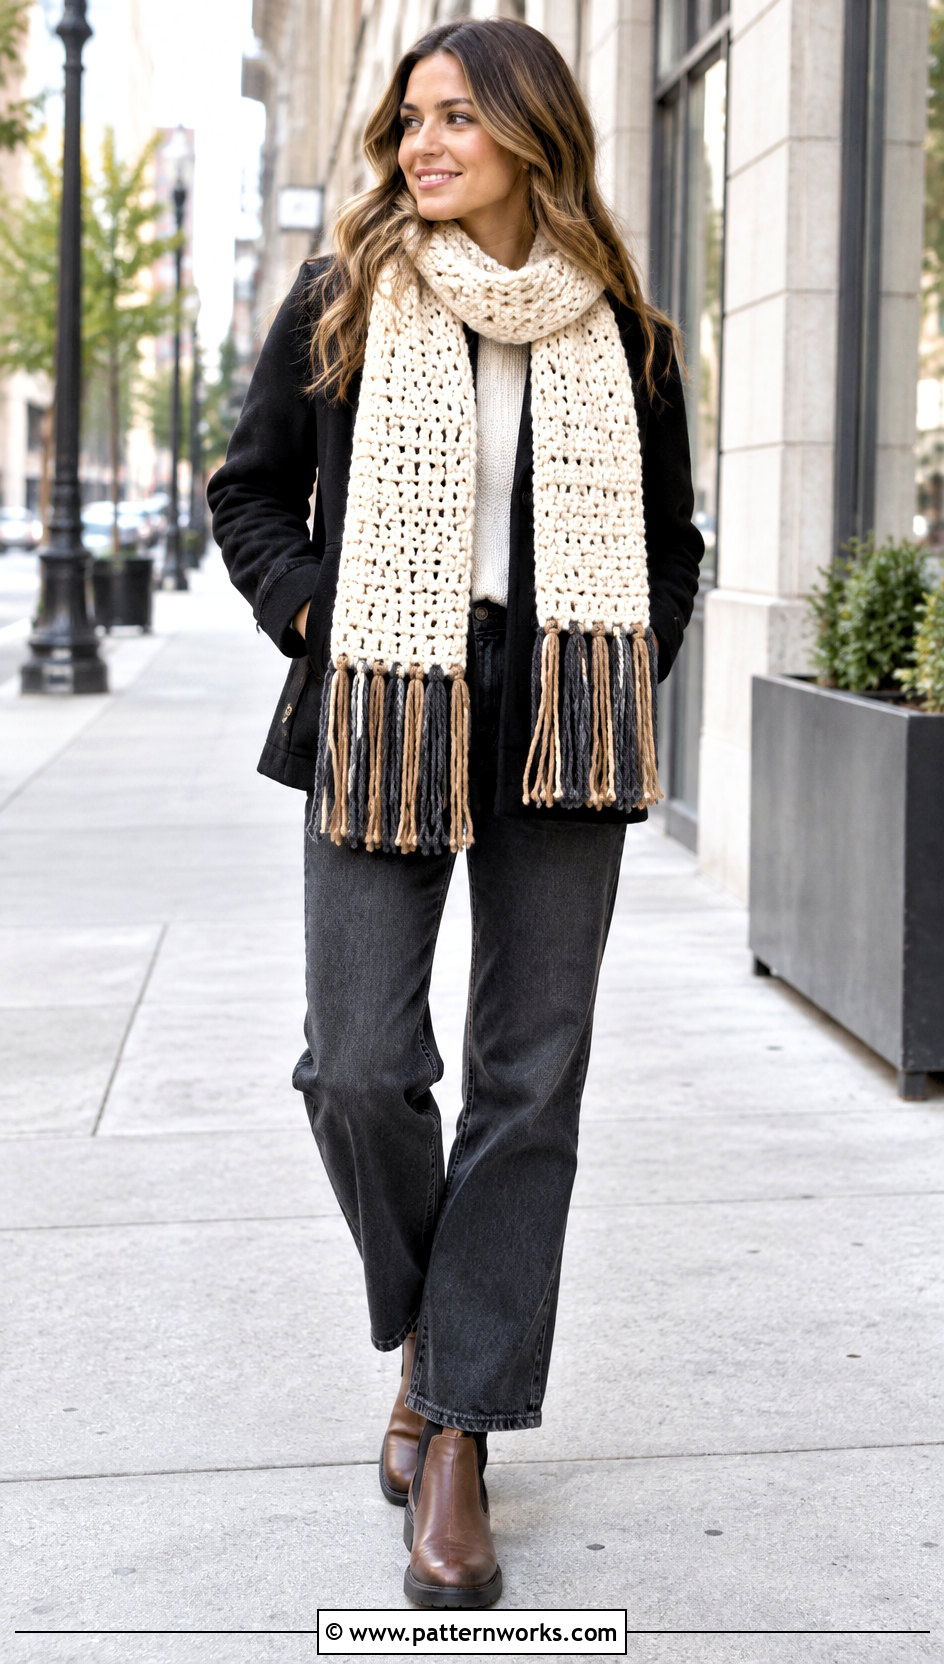
Two-tone fringe can connect the scarf body to a contrasting border, stripe, or accent color. Combine equal strands of both shades in every bundle for a blended effect, or alternate single-color bundles across the edge. A neutral scarf with cream and charcoal fringe feels modern, while brighter pairings create a playful finish. For striped scarves, use the two most prominent colors so the fringe looks connected to the overall design. Lay the strands in their intended order before attaching them, especially when creating a repeating sequence. This prevents accidental clusters of one shade. After installation, separate and smooth the strands before trimming. The simple color change adds visual depth without requiring advanced crochet techniques, making it an approachable option for newer makers.
15. Crochet Scarf With Ombre Fringe
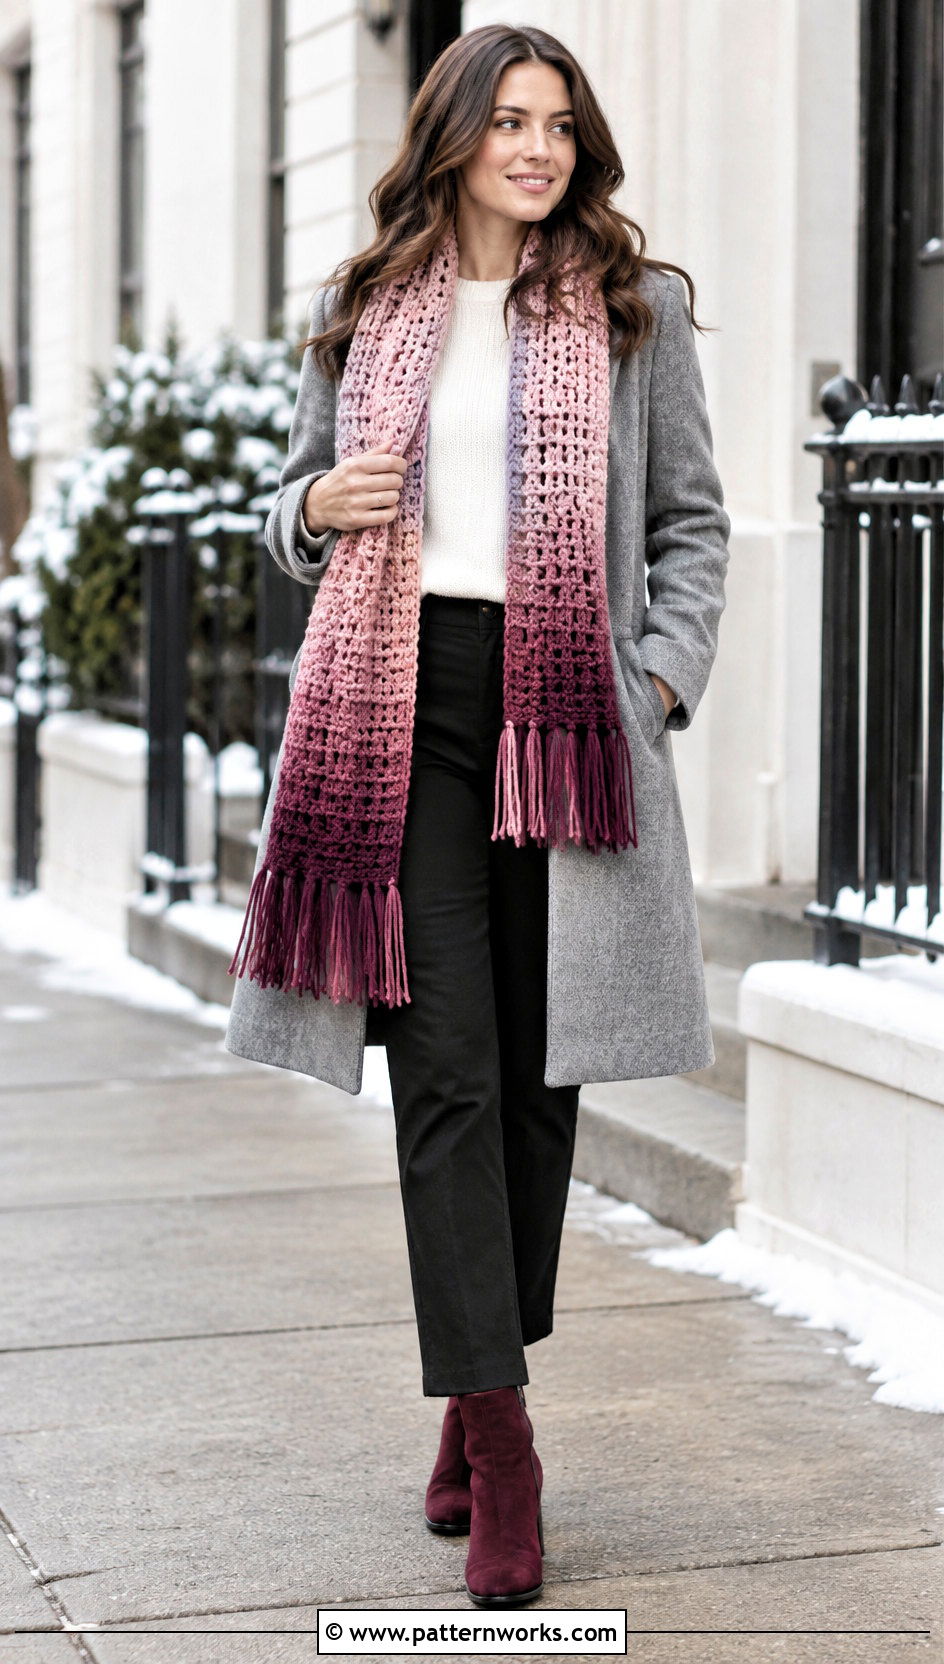
Ombre fringe creates a gradual color transition across the ends of a scarf. Gather several related yarn shades, arranging them from light to dark before attaching anything. Work through the sequence evenly across each edge, then reverse or repeat the order on the opposite side. You can also mix two neighboring shades within a single bundle to soften the transitions. This finish looks especially cohesive when the scarf body already includes gradient yarn, broad stripes, or gentle color blocking. Keep the fringe shape simple so the color progression remains the focus. If your yarns have slightly different thicknesses, adjust the number of strands in each bundle. That small change helps the completed fringe maintain an even density and balanced visual weight.


16. Crochet Scarf With Rainbow Fringe
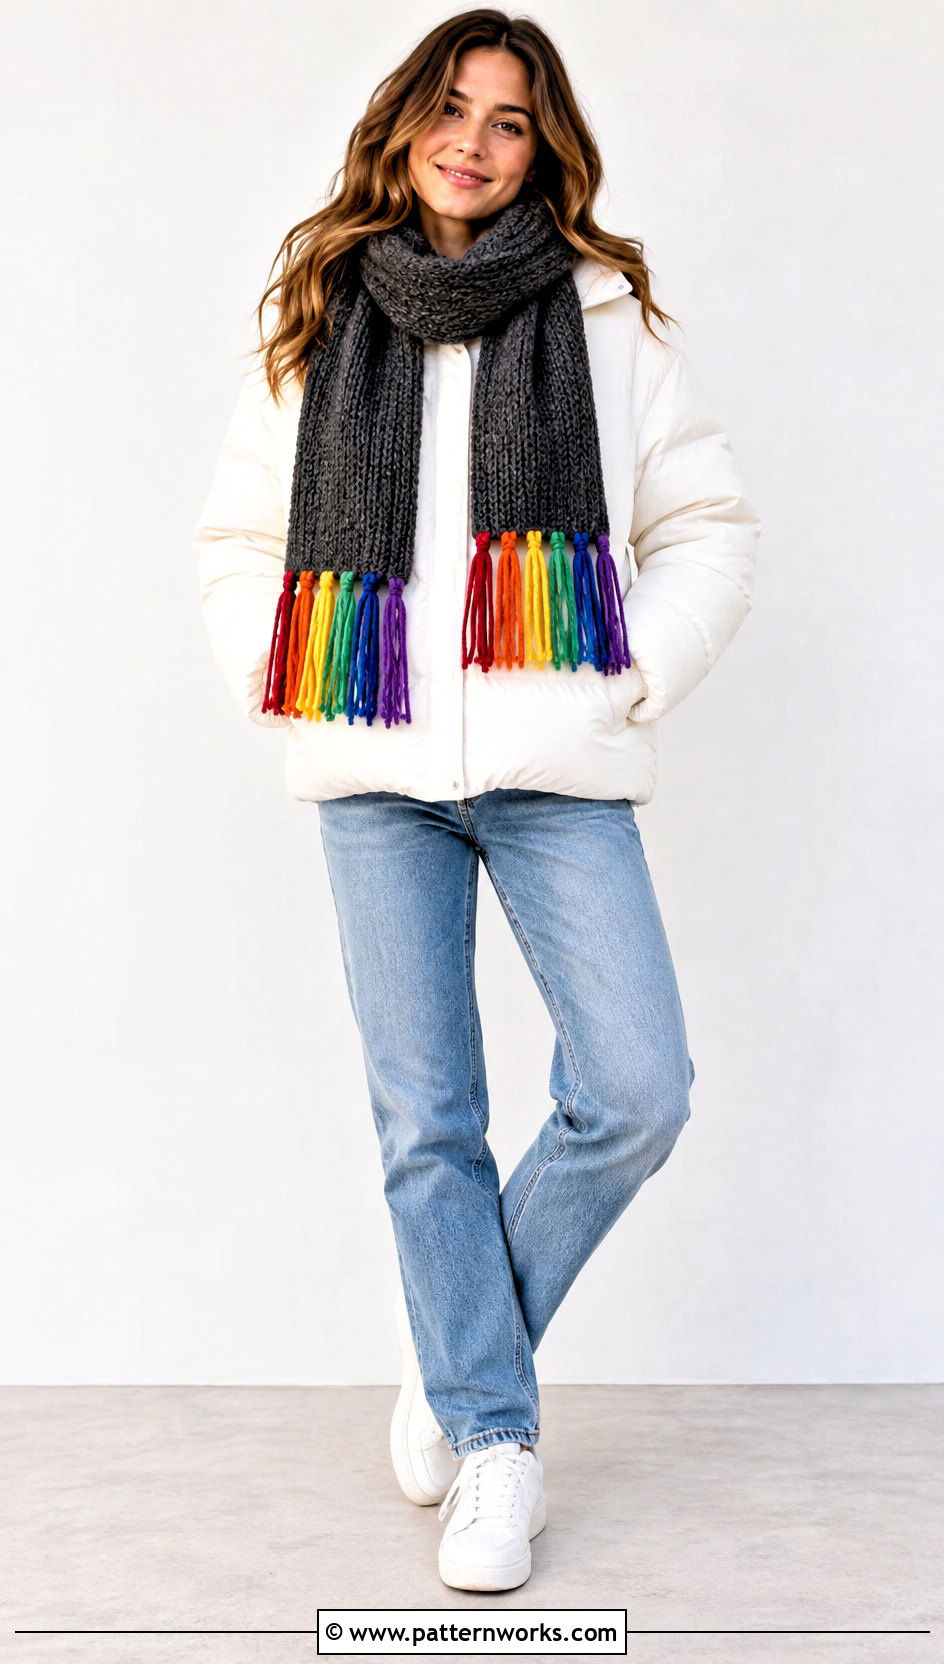
Rainbow fringe instantly brightens a solid or neutral crochet scarf. Arrange red, orange, yellow, green, blue, and purple bundles in a repeating sequence, or mix the colors randomly for a confetti-like effect. A black, white, gray, or cream scarf provides a clear background, allowing every shade to stand out. Keep the bundles modest if you are using many colors, since oversized sections may make the edge feel crowded. Another option is to place one strand of each color in every attachment bundle, creating a blended rainbow across both ends. Measure and cut all shades with the same template before starting. Consistent length and spacing keep the energetic palette looking intentional rather than messy, especially after the final fringe trim.
17. Crochet Scarf With Scrap Yarn Fringe
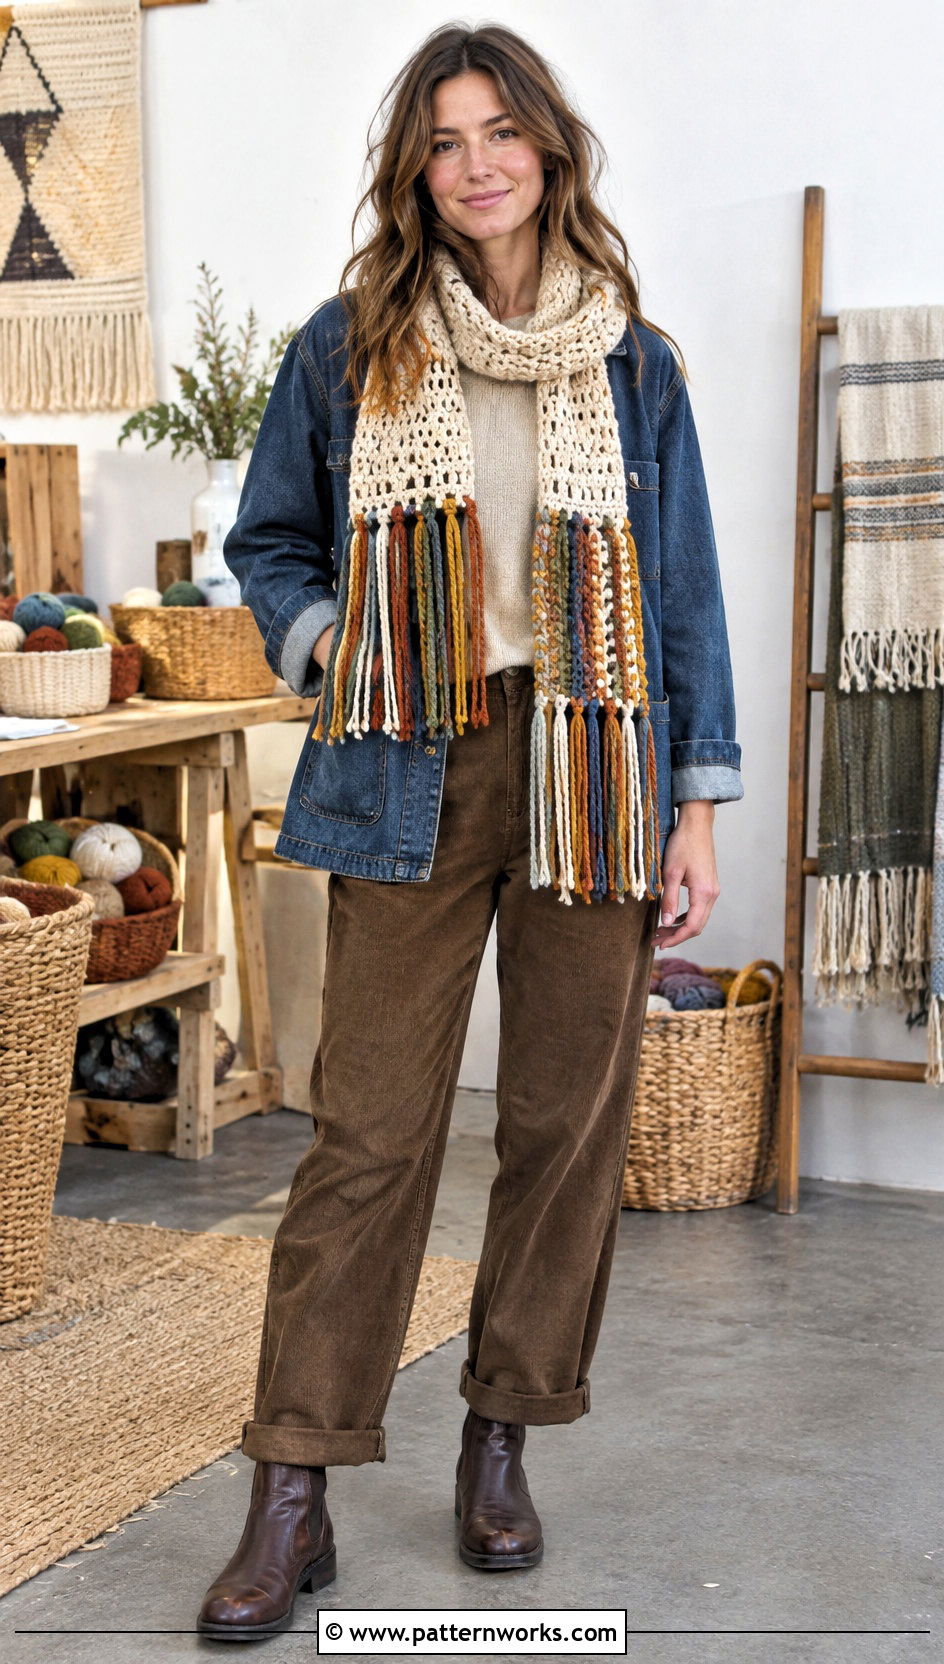
A scrap yarn fringe is a practical way to use small leftovers while creating a unique finish. Choose yarns with reasonably similar weights, then organize them by color family, value, or texture. Earthy leftovers can form a warm woodland palette, while pastels produce a softer spring-inspired effect. Combine several colors in every bundle or attach single-color bundles randomly along the edge. If one yarn is noticeably thinner, use extra strands to match the fullness of heavier pieces. Keep the scarf body simple so the varied fringe becomes an intentional focal point. Before attaching everything, arrange the cut yarn on a table and redistribute any dominant colors. This planning step creates balance while still preserving the charming, mismatched character of the design.
18. Crochet Scarf With Color-Block Fringe
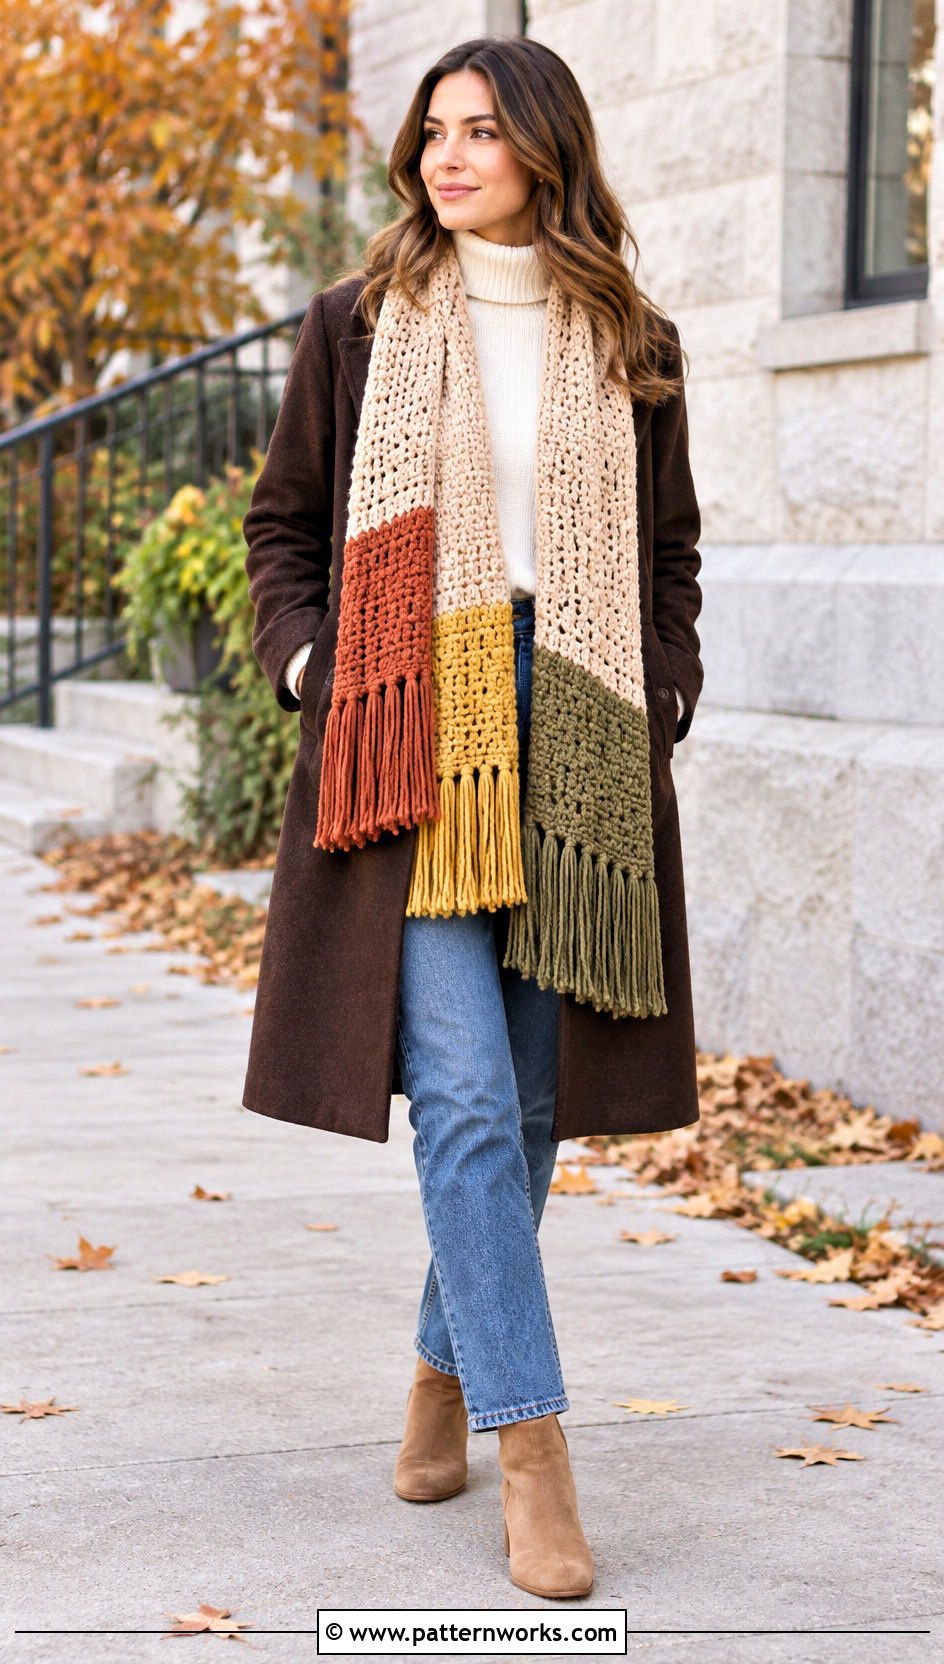
Color-block fringe uses distinct sections of color instead of alternating individual bundles. Divide each scarf end into two, three, or four equal areas, then assign a different shade to every area. The blocks may reflect colors already used in the scarf or introduce a contrasting palette at the ends. A beige scarf with rust, mustard, and olive fringe creates an earthy finish, while navy with white and red feels crisp and graphic. Mark the transition points with stitch markers before attaching the yarn. This keeps each block approximately equal and prevents the color boundaries from drifting. Finish with a precise straight trim because an even baseline strengthens the clean, geometric effect and makes the separate blocks look carefully planned.
19. Crochet Scarf With Alternating Length Fringe
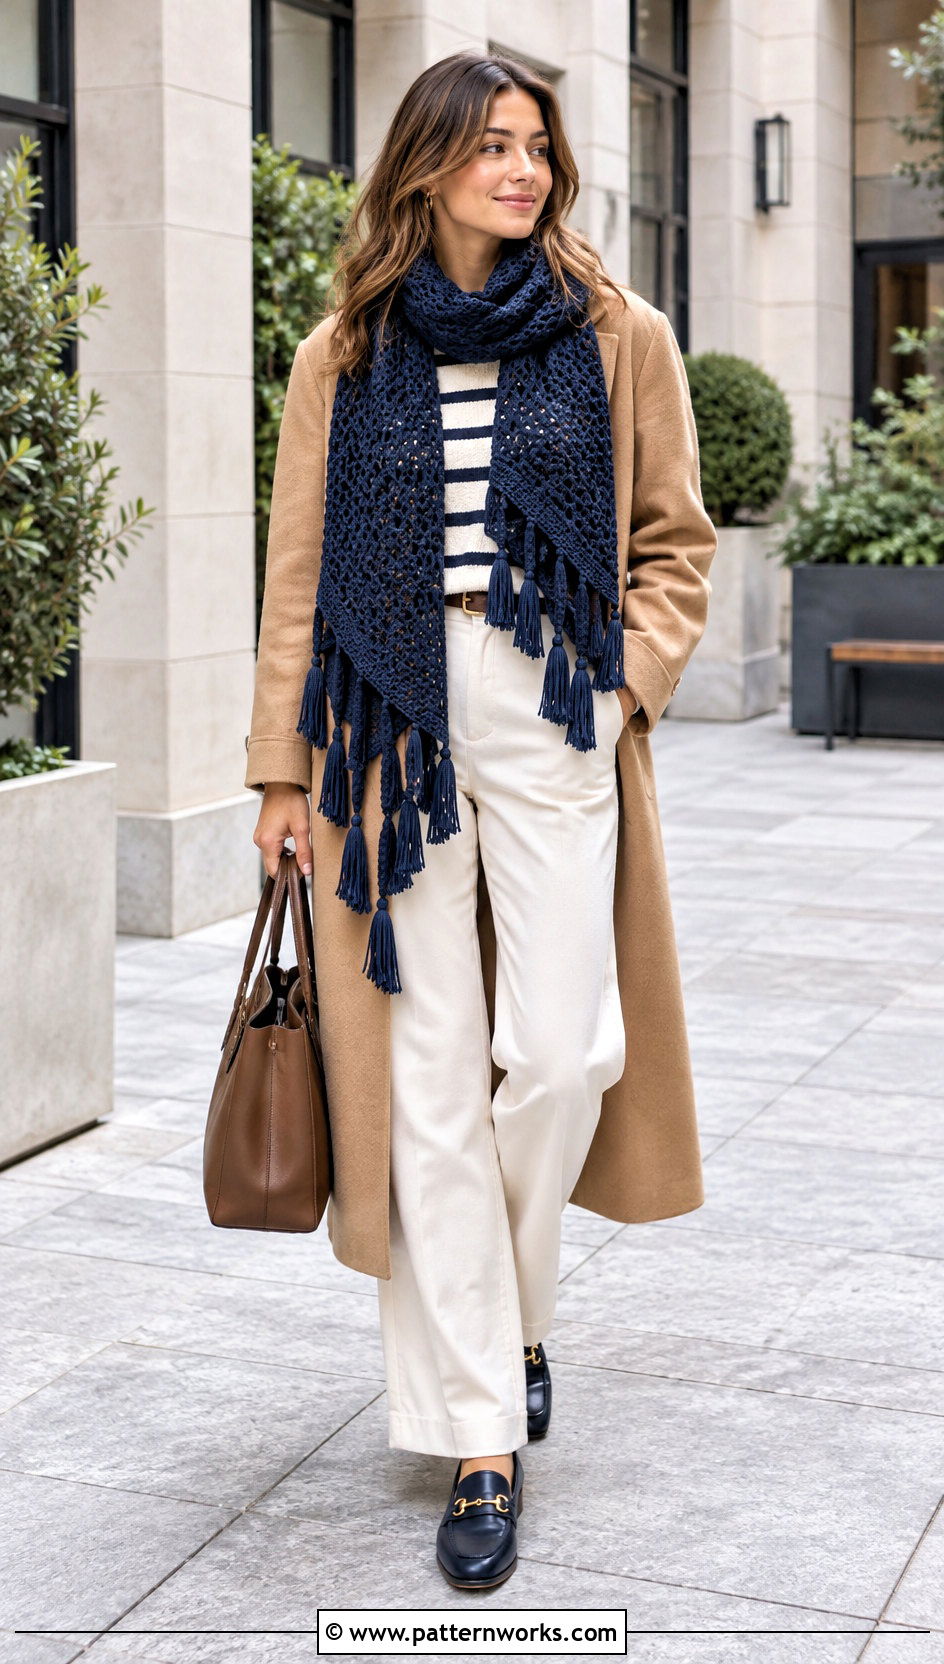
Alternating fringe lengths create shape and rhythm without introducing new colors or complicated knots. Cut two sets of strands, making one set several inches longer than the other. Attach them in a short-long sequence across both scarf ends, checking the order regularly as you work. For a softer effect, use three graduated lengths instead of two. This arrangement suits solid scarves because the varying outline adds visual interest while preserving a cohesive palette. It also works with chunky yarn, although the difference between lengths should be large enough to remain visible. Hang the scarf and trim each length group separately rather than cutting across the entire edge. The finished border can appear gently zigzagged, scalloped, or intentionally irregular.

20. Crochet Scarf With Layered Fringe
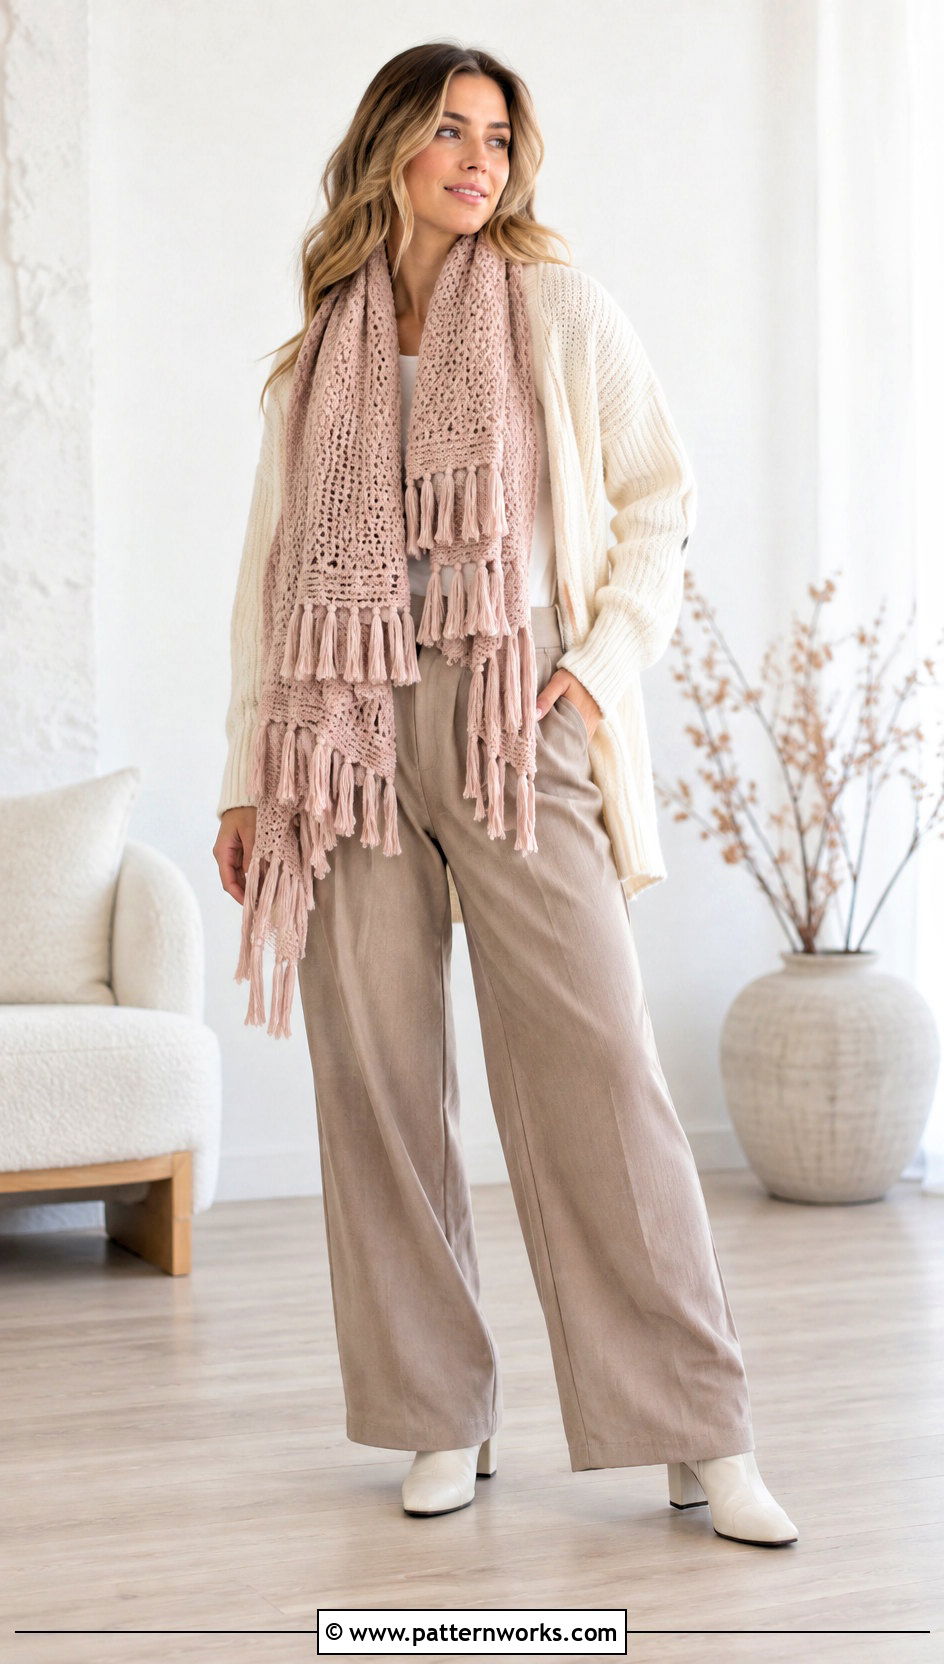
Layered fringe gives the scarf ends fullness without requiring every strand to be extremely long. Begin with a row of short fringe placed close to the fabric. Add a second row of longer strands through nearby edge stitches or open spaces. The two levels should overlap slightly, creating a dimensional border with plenty of movement. Use one color for a subtle tonal finish or contrasting colors to make the layers more noticeable. This approach works best on a sturdy scarf edge that can handle the added yarn. If necessary, crochet a row of single crochet across each end before attaching the fringe. Test a small section first and adjust the number of strands if the border starts feeling too dense, stiff, or heavy.
21. Crochet Scarf With Looped Fringe
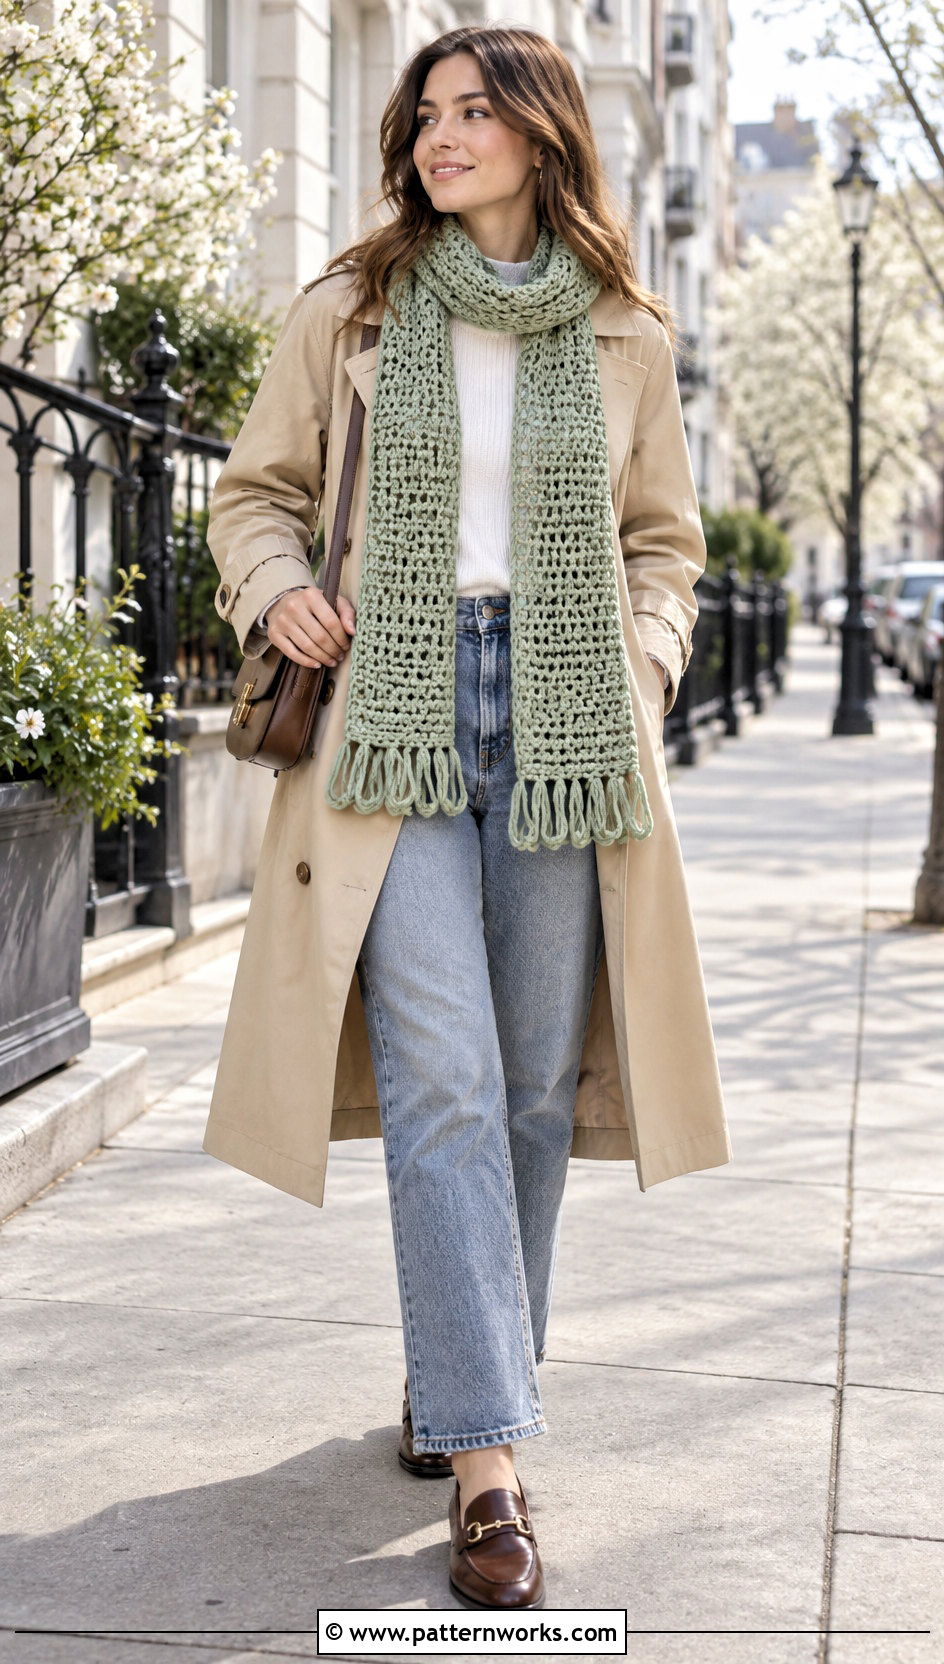
Looped fringe provides a soft, rounded border without exposed yarn ends. Cut long strands, fold them in half, and attach them while keeping the lower fold intact rather than pulling the tails through it. Another option is to crochet chain loops directly into the scarf edge. Keep every loop similar in size for a polished finish, using a cardboard guide if needed. This treatment looks attractive on lightweight scarves, delicate neck warmers, and accessories made with smooth yarn. The loops may be placed close together for fullness or spaced apart for a minimalist appearance. Secure each attachment carefully because looped strands can snag more easily than knotted fringe. Shorter loops are generally easier to wear and maintain than very long ones.
22. Crochet Scarf With Brushed Fringe
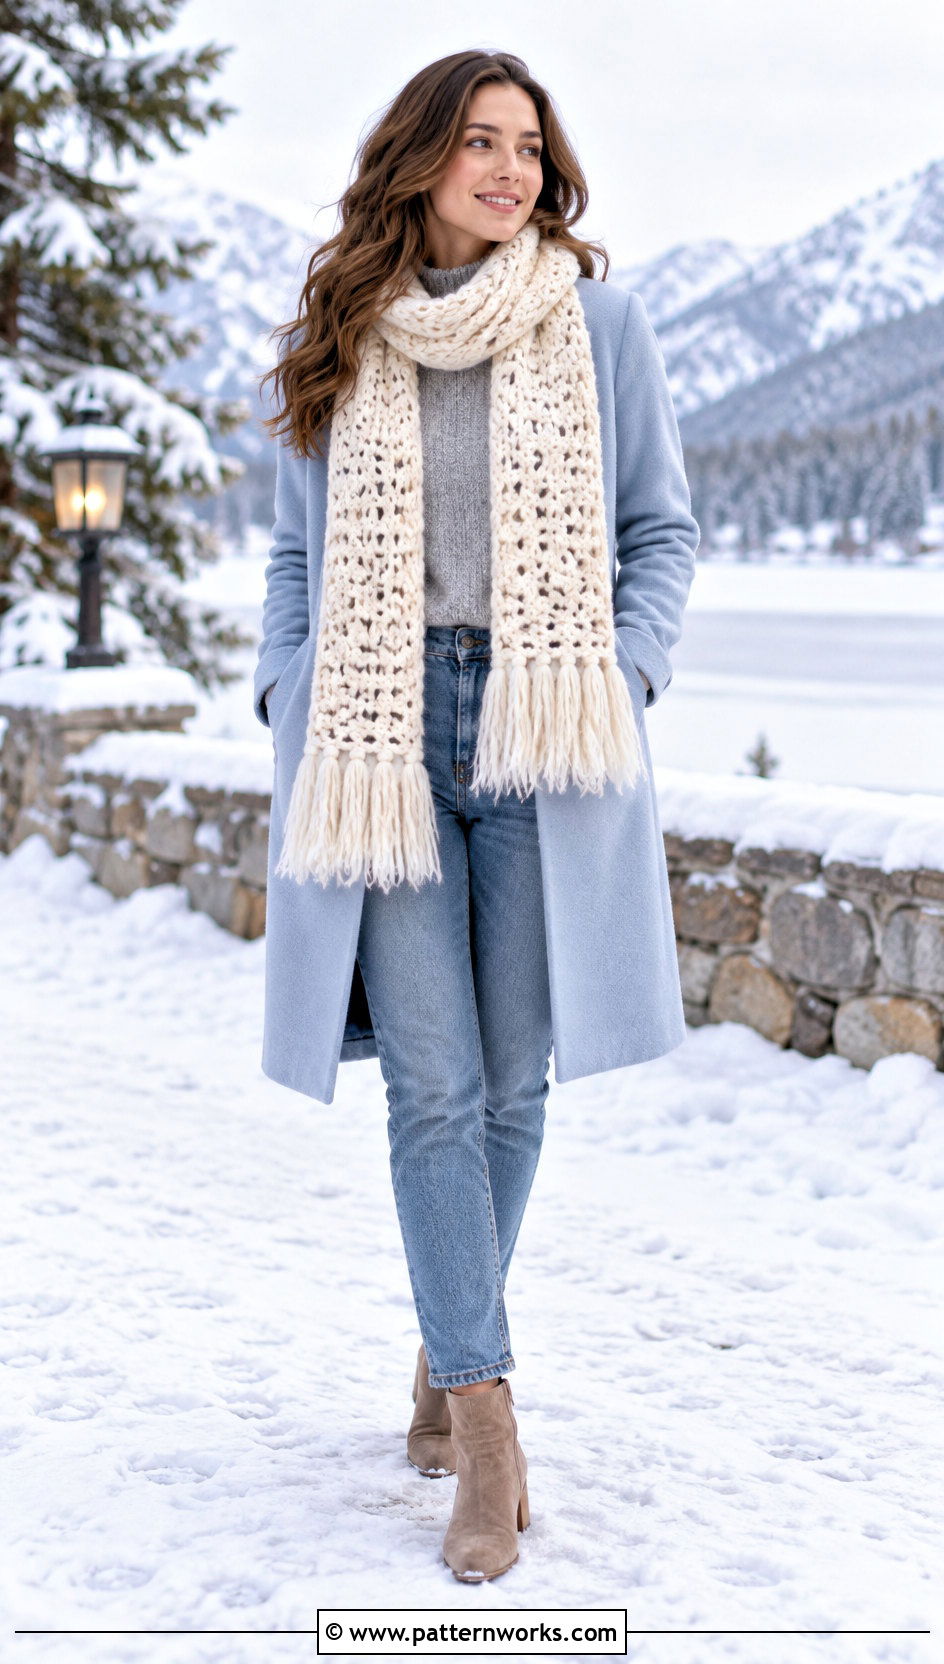
Brushed fringe creates a soft, fuzzy finish that resembles fine fibers rather than separate yarn strands. Choose a yarn that can be gently separated, attach standard fringe bundles, and comb the ends with a clean pet slicker brush or fine-tooth tool. Work slowly from the tips upward to reduce pulling at the attachment points. Brush only the fringe, keeping the scarf body protected on a flat surface. Once the fibers have opened, trim them into an even line. This method is best for decorative scarves that can receive gentle care, since repeated washing may change the texture. Try the technique on a yarn sample first. Not every fiber brushes well, and some yarns may shed, break, or lose too much structure.
23. Crochet Scarf With Spaced Minimalist Fringe
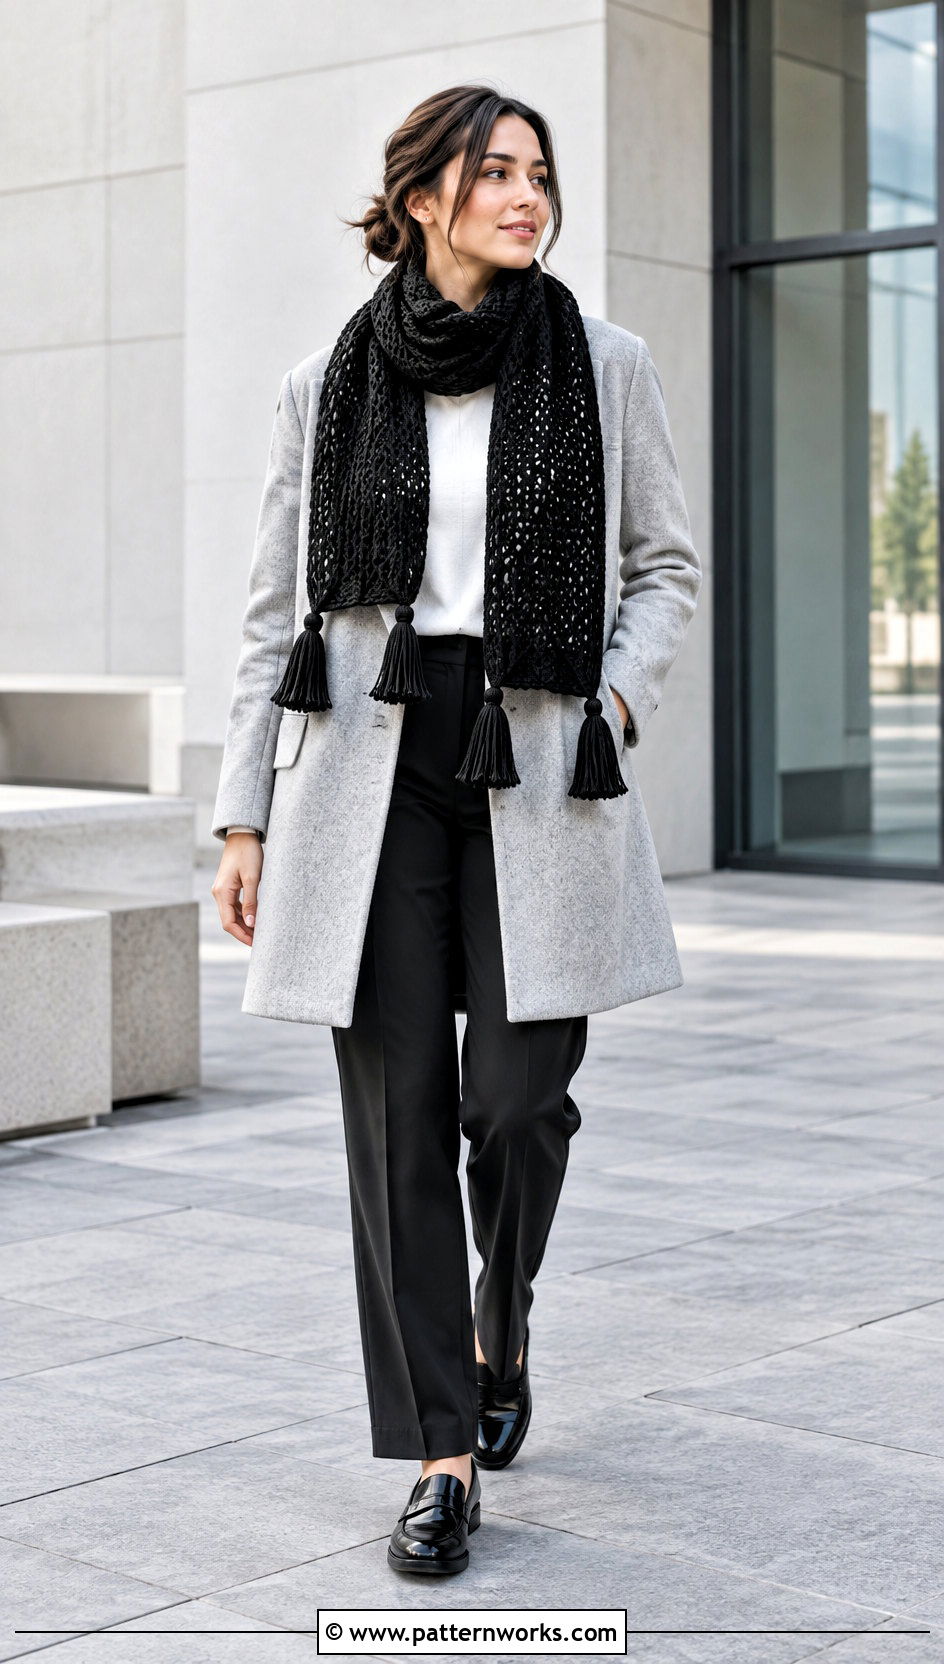
A few carefully placed bundles can finish a scarf without creating a dense border. Attach one small fringe bundle at each corner, then add two or three evenly spaced bundles between them. This layout highlights the scarf’s clean shape and is a smart choice when the stitch pattern already has strong texture. It also reduces added weight, yarn use, and tangling. Make each bundle neat and substantial enough to look intentional rather than unfinished. Matching yarn produces a streamlined effect, while one contrasting color turns the sparse fringe into a graphic accent. Use stitch markers to map the positions before attaching anything. Once complete, compare both ends side by side and adjust the spacing so they appear symmetrical when the scarf is worn.
24. Crochet Scarf With Mixed Texture Fringe
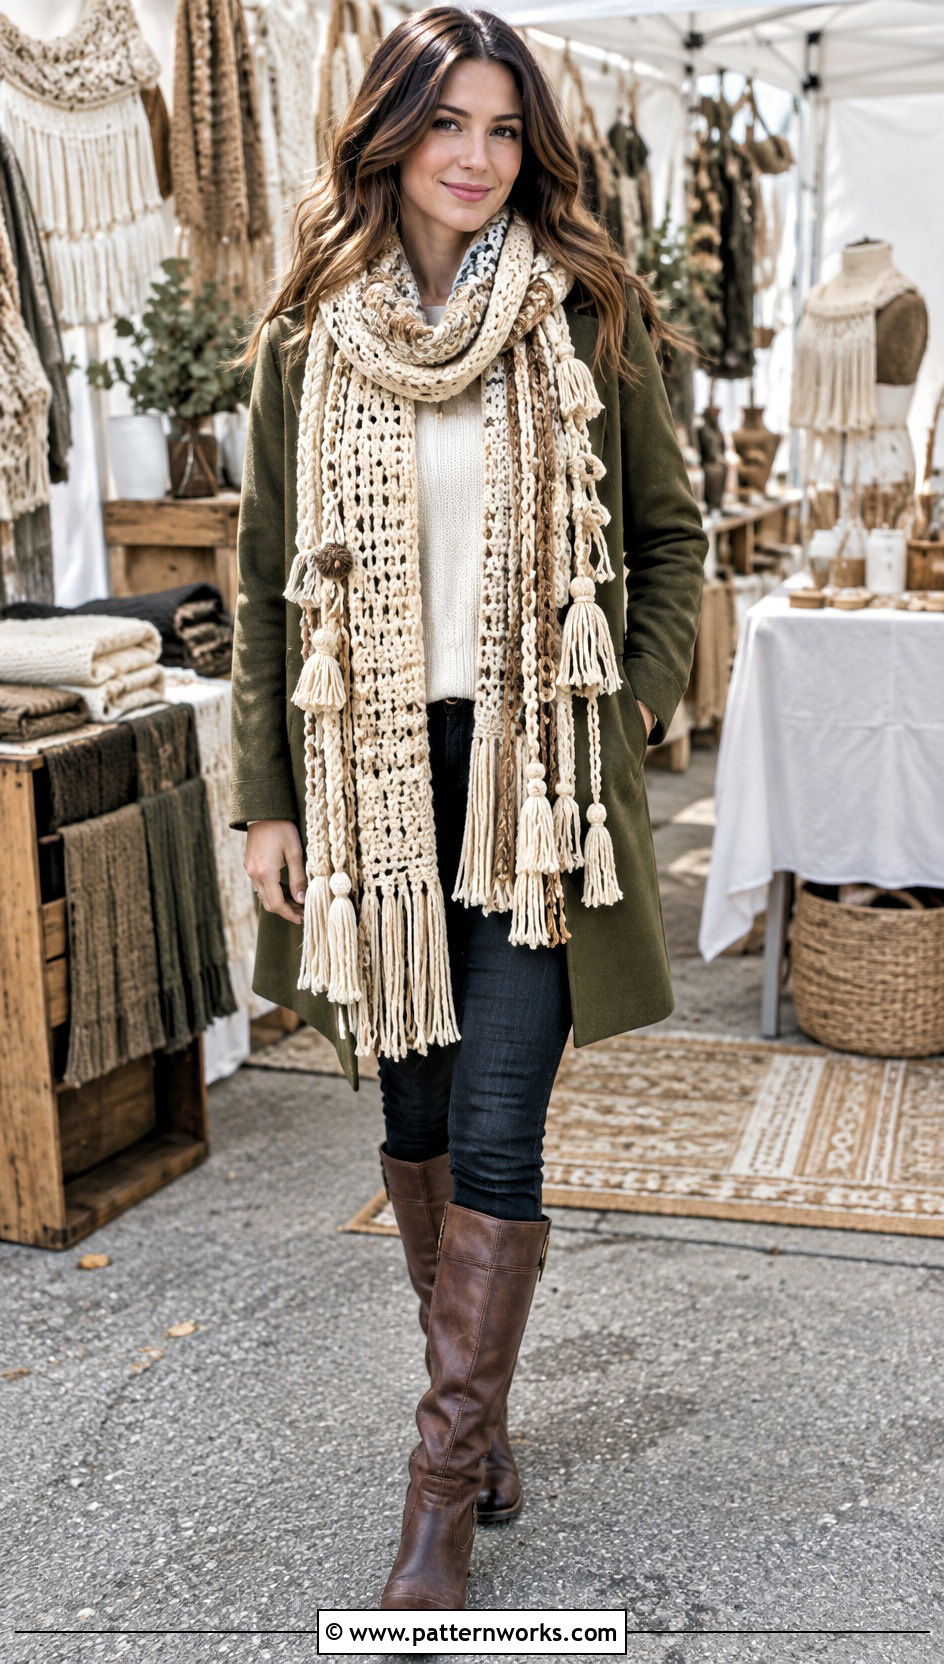
Mixed texture fringe brings several techniques together in one expressive border. Combine loose strands, slim braids, twisted cords, crochet chains, and small tassels while keeping the color palette controlled. For example, a neutral scarf might feature cream and tan fringe in several different forms. Repeat the same sequence across both ends so the variety appears deliberate. Because the individual elements have different finished lengths, make samples first and adjust their starting measurements. Leave enough space between heavier tassels and braids to prevent the edge from becoming crowded. This approach is particularly useful for a simple scarf that needs a statement finish. The result feels artistic and highly personalized while also providing a creative use for coordinating yarn remnants.
Conclusion:
The right fringe can give a handmade scarf a cleaner finish, stronger color story, or completely new personality. Straight strands are quick and beginner-friendly, while twisted cords, braids, macrame knots, and beaded details provide more structure. Tassels emphasize corners, and chains or corkscrews offer playful movement without traditional loose ends. Always sample the fringe before cutting a full set. Check its length, density, weight, and effect on the scarf’s drape. Careful measuring and a final trim will make even the simplest treatment look polished. With techniques for understated accessories and bold statement pieces, these 24 Crochet Scarf Fringe Ideas offer practical inspiration for finishing your next project.
Related posts:
 18 Crochet Truck Scarf Outfit Ideas for Playful Layers
 18 Funny Crochet Scarf Outfit Ideas for Playful Layers
 18 Playful Puffs Crochet Scarf Outfit Ideas for Winter
 24 Pencil Crochet Scarf Outfit Ideas for Playful Style
 30 Crochet Sushi Scarf Outfit Ideas for Playful Layering
 18 Checkered Crochet Scarf Outfit Ideas for Neutral Outfits
 18 Crochet Crayon Scarf Outfit Ideas for Colorful Days
 30 Beginner Crochet Scarf Outfit Ideas for Cold Weather


Leave a Reply